Tuesday, December 25, 2012

Shaped Sugar Cookies

MERRY CHRISTMAS!!
Teddy's first ornament :)
So I've been saving the best Christmas post for last. I hope you'll be able to use these for your Christmas cookie exchange next year. I must say that this is probably the recipe I'm most proud of this holiday season! The cookies turned out not only yummy but also beautiful!! I had never made royal icing before and was a bit nervous...I can assuredly tell you that you have nothing to be apprehensive about. It's super easy to mix up and you can spend the rest of the night decorating away!! 

SUGAR COOKIES with ROYAL ICING
What you need for the cookies:
2 cup all-purpose flour
1/4 teaspoon salt
1/2 teaspoon baking powder
1/2 cup (1 stick) unsalted butter, room temperature
1 cup sugar
1 large egg
1 teaspoon vanilla extract
2 tablespoon milk
Food coloring
Cookie cutters or Christmas Shapes Cookie Pan (mine is by Wilton)

To make the cookies:
1. Start by whisking together the flour, salt, and baking powder.
2. Then, blend together the butter and sugar, until light and fluffy (about 4-5 minutes).
3. Mix in egg, vanilla, and milk.
4. Turn the mixer to low and add the flour mixture in. Mix until blended, being careful not to over-mix.
5. If you wish to color your dough, split it in half in two separate bowls. Add food coloring and mix it in (I used my hand blender for a few seconds to make it evenly colored). 
6. Wrap in plastic wrap and stick in the fridge for at least an hour.
7. Once the dough is chilled, you’re ready to roll it out or use your Christmas shapes pan. If rolling, do so on a floured surface; roll the dough to 1/8-inch thickness and cut into shapes.
8. If you using the shapes pan, take a small amount of dough and push it into the shape until half full and filling all crevices.

9. Bake for 8-10 minutes at 350 degrees, until lightly golden.
10. As a quick tip, to remove cookies from the shapes pan, I let them cool about 4-5 minutes. Then I used a small, metal spreader to loosen the cookie from the side of the pan. They popped right out! This recipe made about 48 cookies.
Here I am loosening the sides of each cookie.
What you need for the royal icing: 
3/4 cup warm water
5 T meringue powder
1 teaspoon cream of tartar
2.25lbs powdered sugar 
Food coloring 
*As a note, this recipe made about double what I needed...feel free to cut it in half!
To make the royal icing:
1. Mix water with meringue powder and whisk for about 30 seconds.

2. Add cream of tartar and whisk again.
3. Add sugar until you've reached desired consistency.

4. Split icing into several bowls and color to your liking.
Now is the fun part- Decorate!!

ENJOY and MERRY CHRISTMAS!

Monday, December 24, 2012

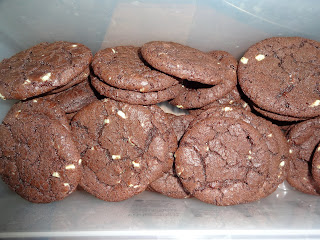
Chocolate Mint Chip Cookies

Good morning and Merry Christmas Eve! I'd like to share another Christmas cookie recipe with you...this one is easy enough to whip together for your party tonight! Chocolate goes well with a multitude of flavors but this time of year chocolate mint is all the rage. Who doesn't love a Starbucks Peppermint Mocha? This is one cookie that would go super with your hot chocolate, cup of coffee or even tea. This is a twist on my double chocolate cookie recipe from earlier this year. You can click on the link to check out more pictures and tips there as well! Instead of chocolate chunks, I added in Andes mint chips and oh my goodness these were to die for!! Happy baking!!

What you need for the cookies:
1 cup all-purpose flour
1/2 cup unsweetened Dutch-process cocoa powder
1/2 teaspoon baking soda
1/2 teaspoon salt
4 ounces coarsely chopped good-quality semi-sweet chocolate,
6 ounces Andes chips
1 stick (8 tablespoons) unsalted butter
1 1/2 cups sugar
2 large eggs
1 teaspoon pure vanilla extract

To make the cookies:
1. Preheat oven to 325 degrees. Whisk together your flour, cocoa powder, baking soda, and salt in a medium bowl; set aside.
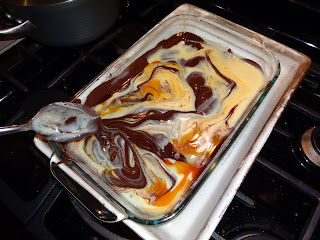
2. Melt coarsely chopped chocolate with the butter in a microwaveable bowl on low; stir about every 30 seconds until melted.
3. Transfer chocolate mixture to a bowl. Add sugar, eggs, and vanilla; mix on medium speed until combined.
4. Reduce speed to low; gradually mix in flour mixture. Fold in Andes chips with a spatula. 
5. Refrigerate dough for about a half hour or until firm. (I once again left mine overnight and then took it out about an hour before I was ready to use it. The batter is really gooey right away so it really should be chilled for at least a little bit.)
6. Form batter into balls and place 2 inches apart on parchment-lined baking sheets. 

7. Bake until cookies are flat and surfaces begin to crack, about 12-15 minutes. Let cool on sheets about 3-5 minutes, then transfer to wire racks to cool.

ENJOY!!

ps. For those of you who love our cat as much as us...


Saturday, December 22, 2012

What is Christmas without some Gingerbread?

Time for another holiday treat! And why not another festive Teddy picture?!

So I made these little guys last year as well but with a different filling- they're a really big hit with any age!! I love gingerbread around the holidays but I like to be able to put a slightly different twist on it than all the other standard gingerbread recipes. I also love that these aren't as sweet as some of the other treats I make this time of year. It breaks things up a little bit!! The whoopie pie is a classic- two cake like cookies filled with some sort of frosting or cream- no one can say 'no thanks' to this cute little treat!! This is a gingerbread cookie sandwich filled with maple buttercream frosting- YUM!!

What you need for the whoopies:

2 1/2 cups flour
1/2 teaspoon salt
1 teaspoon baking powder
1/2 teaspoon baking soda
1 1/2 teaspoons ground ginger
1 teaspoon ground cinnamon
1/4 teaspoon ground cloves or allspice
1/2 cup unsalted butter, softened
1/4 cup brown sugar, firmly packed
1 large egg
1 cup molasses
1/2 cup buttermilk

To make the whoopies:
1. If using an oven, preheat to 375 degrees and line cookie sheets with parchment paper. If using your whoopie pie maker (as I do) plug it in to preheat. Preheat the oven to 375°F. 
2. Whisk together the flour, salt, baking powder, baking soda, and spices; set aside.
3. Combine the butter and brown sugar, beating until the mixture is fluffy (about 4-5 minutes).
4. Beat in the egg, scraping the bottom and sides of the bowl.
5. Once the butter, sugar and egg are well combined, add half the dry ingredients. Mix well, then beat in the molasses, the remaining dry ingredients, and the buttermilk in that order. Beat for a good 4-5 minutes until the batter is fluffy.
6. Use a rounded teaspoonful to drop the batter onto your prepared baking sheets or the wells of your whoopie pie maker.
7. Bake cakes until puffed and set, about 10 to 12 minutes in oven or 5-6 minutes in your counter-top maker. 
8. Remove from the oven or maker and cool on a wire rack. 

What you need for the frosting:
1 cup unsalted butter, softened
1/2 cup pure maple syrup 
1 teaspoon ground cinnamon
2 cups confectioners sugar
2 Tbs milk

To make the frosting:
1. Beat butter and maple syrup together until well combined.
2. Add powdered sugar one cup at a time, alternating with the milk until you've reached the desired consistency.
3. Refrigerate for about an hour until firm enough to spread between the cookies.

And I must apologize, I got so caught up in all my holiday baking that I forgot to take a picture of the final product all put together- guess you'll have to make some and see for yourself!

This recipe makes about 24 sandwich cookies. 

ENJOY!!

Thursday, December 20, 2012

Holiday Truffles

Hi Everyone!! Time for some of the holiday baking posts to begin! I'm so excited to be sharing these Christmas recipes with you. First, here is a fun Christmas picture of the cutest kitten ever!

And yes, there are Happy Birthday presents as well- lots of friends with December birthdays!
Some of them are tried and true while others are brand new! What are all of your plans for the upcoming holidays? Do you have a lot of traveling to do? Well I can guarantee that this is one treat that will travel really well! Danny and I each had lots of goodies to deliver today at our workplace and I can tell you from the feedback I received that these truffles were a huge hit! They were probably one of the easiest recipes that we put together and definitely one of the most favorite. Please feel free to experiment with the chocolates and let me know what you think!

DOUBLE CHOCOLATE TRUFFLES


What you need for the truffles:
8 ounces good semisweet chocolate
8 ounces good bittersweet chocolate
1 can (14 Oz) sweetened condensed milk
1 Tablespoon vanilla extract (you could switch this up for fun and go with mint or maybe almond? Have fun!)
1lb meltable white almond bark (and one teaspoon vegetable shortening)
Red and green crystal sugar or Christmas sprinkles

To make the truffles:
1. Set-up a double boiler and start with the can of sweetened condensed milk. 
2. While this is warming, I started my chocolate squares in a microwave safe Pyrex dish- about 1 minute. I felt that giving this a head start really helped with the double boiler technique.
3. Once the chocolates are warm (they won't even really look melted), add them to the already warming sweetened condensed milk. 
4. Stir continuously until everything is combined- mixture will have a slight marshmallow texture. Stir in vanilla extract (or whatever you decide to use).
5. Remove from heat, cover and refrigerate for about two hours.
This was after it had chilled for a couple hours.
6. Right before you're ready to pull the mixture out of the fridge, melt your almond bark in a microwave safe container with the teaspoon of shortening. Mix it up about every 40 seconds. 
7. Roll your chilled chocolate mixture into balls, then dip in melted white chocolate. Sprinkle with the red and green sugar or Christmas sprinkles. 


MERRY CHRISTMAS!! ENJOY!

Sunday, December 9, 2012

JalapeƱo Poppers!!

Hi Everyone! Welcome to Mexican day in the Hlavek household! We love making fajitas here over the weekend...nothing like grilling up some already marinated flank steak and chicken, making rice, queso and peppers with onions. Maybe even some guacamole if we're ambitious. Yum! Today we tried an appetizer to our regular feast- jalapeƱo poppers! And boy were this little bad boys HOT! Don't get me wrong, they were amazing but be prepared for a little extra heat with these puppies. I saw this recipe while watching the cooking channel the other day and was inspired. The only real change-up was that we made a lot more than the recipe called for and I switched the cheeses. Do give these a shot during your next get-together...the recipe is super easy to throw together and I know you'll impress your guests!

What you need for the poppers:
6-7 fresh jalapeƱos
1 cup shredded cheese (we used a variety of white cheddar cheese, sharp cheddar cheese and marbled cheddar cheese- if you have the time, buy the blocks and shred it up yourself...it melts and oozes so much better)
1 can of beer
1 egg
1 cup of flour

To make the poppers:
1. Turn on your fryer and heat oil to about 350-375 degrees. If you don't have a deep fryer, you can use a shallow pan filled with vegetable or peanut oil. Turn it on early so you can get your oil to temperature.
2. Slice your jalapeƱos down the center/side of the pepper. Clean out all of the seeds (and I mean ALL the seeds- we left a 'couple' thinking that would add some spice and we can barely breathe right now!)

3. Shred your cheese or measure out 1 cup from your bag of shredded.

4. Stuff the peppers really full of cheese...keep shoving it in there until no more can fit!

5. Make your batter by mixing the 1 cup of flour with half of a beer (about 6oz) and one egg. Whisk it together in a bowl until there are no more lumps.
6. Dip your cheese filled peppers into the batter by holding the top of the pepper. Twirl it around until the pepper is completely coated. 

7. Drop your stuffed and battered jalapeƱo peppers into the hot oil. Let them go about 5-7 minutes until brown, then flip for about another 3 minutes. Pull them out and place on a paper towel to allow excess oil to drip off.

8. They are both temp hot and heat hot so be careful before you...

ENJOY!! 

Friday, December 7, 2012

Baby Cake Baby Cake


Hi Everyone! How are all of you? I am sorry it’s been a while since my last post… a few things here and there have happened that put me out of commission for a couple of weeks! I can’t say that I haven’t baked though- that is my source of stress relief! I just haven’t had all the energy to blog about each of them. Hopefully I can get right back in it now! Today’s recipe is quite fun :) I made a cake for a baby shower so this one outlines some of my decorating tips but you can easily just use the cake recipe and then decorate it however you like.

Don’t you feel like Bundt cakes are a lost art these days? I swear you never see them anymore! I know they may seem a little old-fashioned but they are usually really moist, tasty cakes. I think one of the first recipes I posted was a Bailey’s Irish Cream Bundt…so amazing!! They are super easy to do and the recipes are usually quite simple- you can even use a cake box mix. The reason I actually picked this recipe for the shower was because it was mid-week and I knew I wouldn't have a lot of time. Bundt’s are pretty standard…you mix up a batter, pour it in the pan and bake for about an hour. As long as your grease the pan really good, it falls right out. Then I bought a few fun things to decorate and wa-la, you have a cute, tasty cake for your next event!

What you need for the cake:
2 1/4 cups all-purpose flour
1/2 teaspoon baking powder
1/2 teaspoon salt
1 1/2 cups packed light brown sugar
3/4 cup granulated sugar
1 cup butter, softened 
1/4 cup vegetable oil
4 eggs
2 teaspoons vanilla
3/4 cup milk

What you need for the glaze:
1 cup butter
1/2 cup packed light brown sugar
2 tablespoons milk
1 tablespoon light corn syrup (you could use maple syrup here if you want to switch up flavors a bit)
1 teaspoon vanilla (almond extract is another flavor option)

Decorations:
Baby stickers
Piece of cardstock
Chip clip (or standing picture frame clip)
Pacifiers (I used 4 but you can use as many as you like!)
Blue and pink sugar crystals

To make the cake:
1. Heat your oven to 350 degrees F.
2. Grease the bottom and side of 12-cup fluted tube cake pan with shortening (Crisco); lightly flour.
3. In a medium bowl, mix flour, baking powder and salt; set aside.
4. In a large bowl, beat 1 1/2 cups brown sugar, the granulated sugar and softened butter with electric mixer on low speed 30 seconds, scraping the side of the bowl as needed. Once combined, beat on medium speed about 5 minutes, scraping bowl occasionally, until light and fluffy. Don’t skimp on this beating…it really makes the cake fluffy and moist! 
5. Beat in the eggs, one at a time, beating well after each addition. Add 2 teaspoons vanilla.
6. Beat in the flour mixture alternately with 3/4 cup milk on low speed until smooth. Pour into prepared pan. 
7. Bake 1 hour to 1 hour 10 minutes or until toothpick inserted in center of cake comes out clean. Cool for 10 minutes, then remove from the pan to a cooling rack. Cool completely.


8. Using a long, wooden skewer poke holes over the entire cake (this is to help the glaze absorb).

To make the glaze:
9. Meanwhile, while your cake is cooling, start the sauce. In a 2-quart saucepan, heat all sauce ingredients except vanilla to boiling over medium heat, stirring constantly; boil and stir for 2 minutes more. 
10. Remove from heat and let it cool to the touch (about 10 minutes); then stir in 1 teaspoon vanilla.

Put it all together:
11. I first poked the holes in the top of the cake like I mentioned above and then also cut out four sections that were about the size of the top of the pacifiers. (Save these pieces of cake- it will help with the middle section.) 
12. Then I basted the sauce on top of the cake until I couldn’t get any more to absorb…then I poured even more of it over the top! (As a side note, I still had a lot leftover so you can probably either cut the sauce recipe in half or serve it on the side.) 
13. Next, I sprinkled blue and pink sugar crystals on top while the sauce was still wet so they would stick. Then I pushed the pacifiers back in the holes I had cut out! 

14. For the center piece I just cut a piece of card-stock freehand and used some baby stickers I found in the scrapbooking section at Wal-Mart. The chip clip is held in place in the center of the cake using the leftover pieces from the pacifier holes. I just wedged the pieces in the middle around the chip clip to hold it there. A standing clip photo frame would work best but I couldn’t find any at the last minute so this worked just fine.

Everyone really enjoyed the cake. I think this is a perfect recipe for the upcoming Christmas holiday parties. You could use red and green sugar crystals instead!

ENJOY!