Sunday, August 19, 2012

Not your average corn muffin

Hello everyone! Sorry for the delay in posting- I was back in Canada this past week. Such a refreshing change in weather- I could be baking without guilt there every day. It was only 40-something in the morning when we got up- my blood was sure not used to that! Anyway, I returned Thursday and Danny and I planned our weekend meals. Although it has not been as cool as Canada, there was still a nice drop in temperatures in West Lafayette that had me thinking fall. I was craving a big pot of chili and corn muffins! I had seen a Pinterest post a while back for jalapeno cheddar corn muffins that looked amazing and I had to give them a try! As always, I’ve adapted the recipe to fit our likes so feel free to do the same. I hope you enjoy the spicy treat as much as we did!

JALAPENO CHEDDAR CORN MUFFINS

What you need for the muffins:
1 cup all-purpose flour
1 cup cornmeal
1 tablespoon baking powder
1/2 teaspoon salt
1/2 teaspoon black pepper
6 tablespoons unsalted butter, melted
1 cup buttermilk
2 tablespoons honey
2 large eggs
1 jalapeno, seeded and diced (be careful not to touch your eyes when you do this! I also kept a few of the seeds for a little extra oomph!)
12 jalapeno slices (I used these from a jar since I only bought one jalapeno but you could use fresh)
1/2 cup fresh shredded Parmesan
1/2 cup shredded cheddar, plus more for topping

To make the muffins:
1. Preheat the oven to 400 degrees F.
2. Spray a 12-cup standard muffin tin with Pam or grease (you could also line the muffin tin with paper liners) set aside.
3. In a large bowl, combine the flour, cornmeal, baking powder, salt and pepper.
4. In a large glass measuring cup or another bowl, whisk together the butter, buttermilk, honey and eggs.
5. Pour your wet mixture over the dry ingredients and mix until just combined.

6. Add the two cheeses and diced jalapenos and mix until evenly incorporated.

7. Place batter into your muffin tins about 3/4 full.
8. Top with a jalapeno slice and then sprinkle with cheddar cheese.

9. Bake for 12-15 minutes until a toothpick comes out clean.


ENJOY!

Wednesday, August 8, 2012

Cake Craze!

The Hlavek household has been a busy bakery tonight! Just call us snack and sugar junkies this week! Between leftover spinach artichoke dip and turkey meatballs (in addition to dinner!) on Monday and a movie night yesterday with way too much popcorn, we’re on chow overload here! Might as well wash all of that early week snacking down with a sugar splurge, right? At least I do have somewhat of an excuse: We’re heading over to our pastor’s house for a visit tomorrow and I offered to bring dessert. See, some of this won’t be eaten tonight! ;) But since we have been in mindless munching mode, I thought I’d throw in one more sweet treat for fun (and I promise we’ll share the leftovers tomorrow at work)!

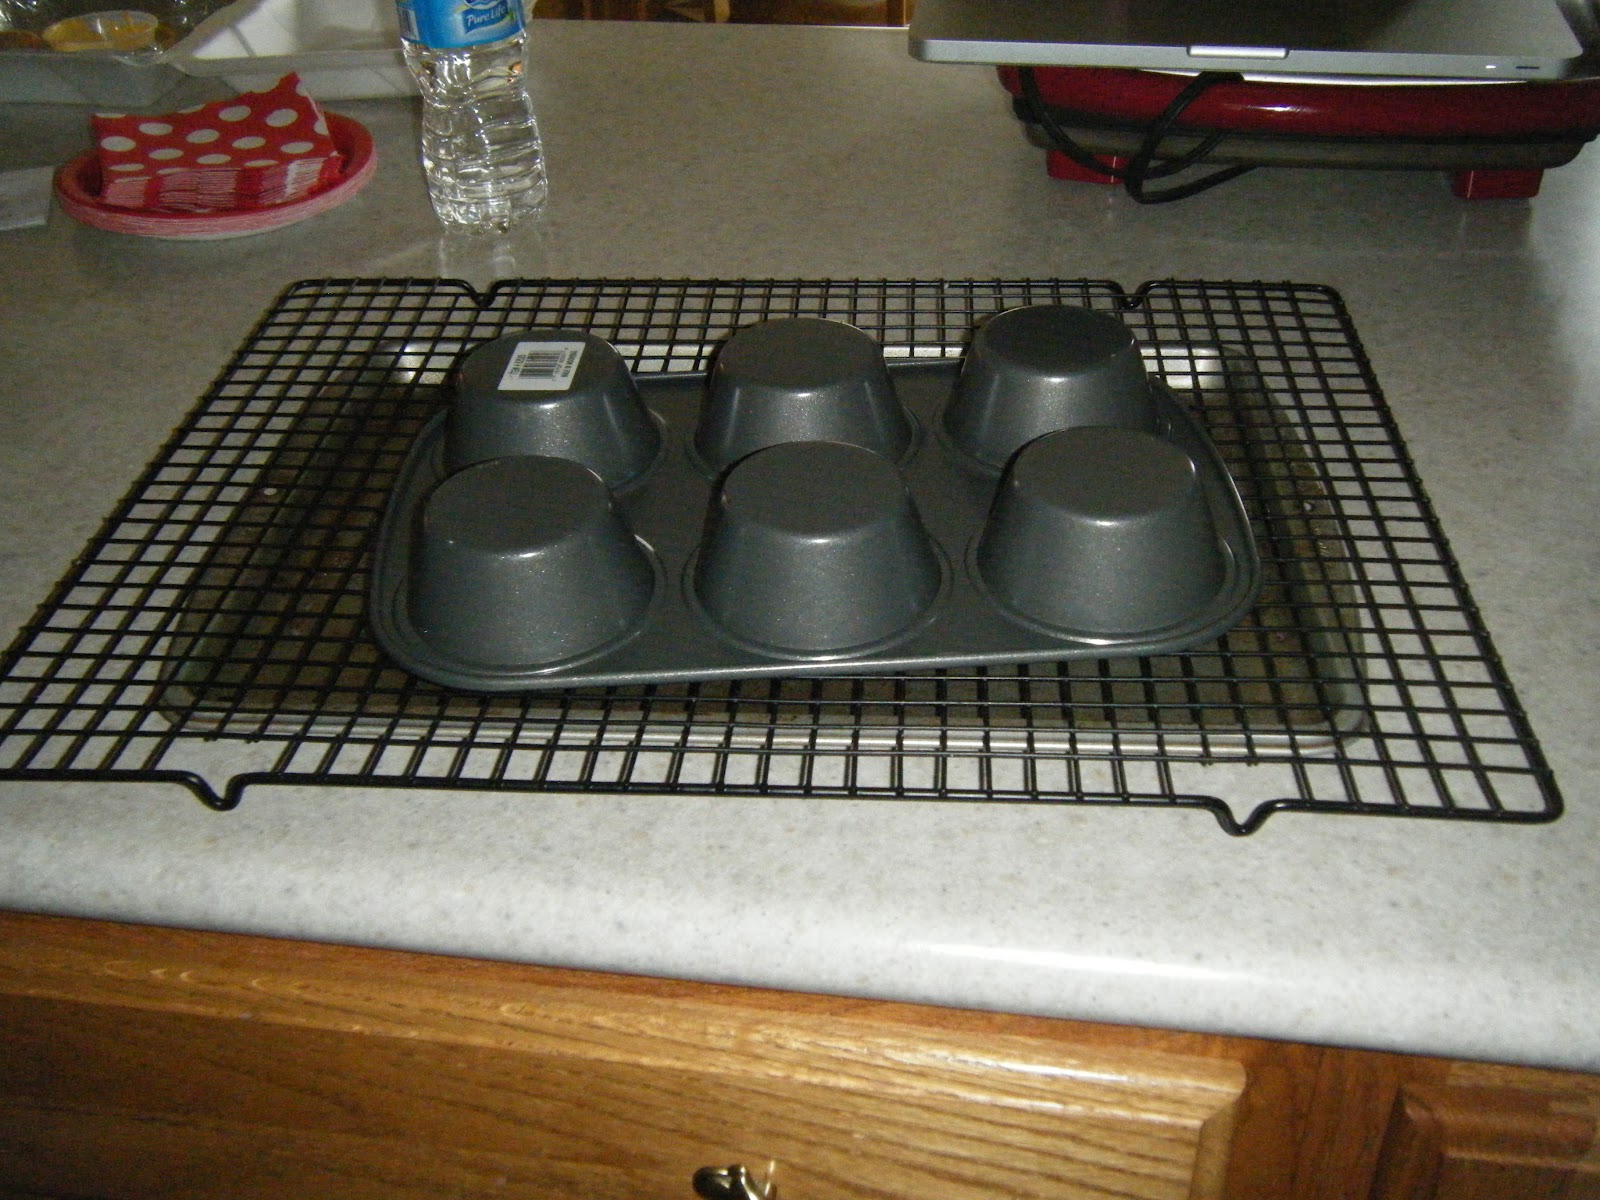
One of Danny’s favorites is pineapple upside down cake. Surprisingly, I have never made this. (I know, I’m a bad wife!) However, most of the time Danny is not much of a dessert person and making an entire pineapple upside down cake for just the two of us would be outrageous. (Although, at the rate we’re going this week I probably shouldn’t talk!) Anyway, it has been on my list to do for quite a while and I’d seen a cute twist on the classic from Pinterest so it’s time to give it a whirl! The recipe makes 6 jumbo cupcakes or 8 regular. Danny was upset to learn that the regular size pan would not allow the entire pineapple ring to fit in the bottom; I wanted an excuse to buy a new pan so jumbo size it is!

To quench our crunchy munchy mood, I came across a Cake Batter Buddies recipe that I just couldn’t pass up. Since I had all the ingredients on hand for both recipes I took that as a sign to just get busy in the kitchen! We’ll start with the cakes since they’ll be the most time consuming- although still fairly easy. While they’re baking we can get busy with the CBBs!

PINEAPPLE UPSIDE DOWN (JUMBO) CUPCAKES

What you need for the cake:
2 eggs
2/3 cup white sugar
5 Tbsp pineapple juice
2/3 cup all-purpose flour
1 tsp baking powder
1/4 tsp salt
Jumbo or regular muffin tin (makes 6 jumbo or 8 regular-I’m doing the jumbo size)

What you need for the topping:
1/4 cup butter (1/2 stick)
2/3 cup brown sugar (I used 1/3 cup light, 1/3 cup dark)
1-can pineapple rings
6-8 maraschino cherries

To make the cake:
1. Preheat the oven to 350 degrees.  Spray your muffin tins with non-stick cooking spray. 
2. In a mixing bowl add eggs, white sugar, and pineapple juice.  Beat for 2 minutes. 
3. In a separate bowl sift together the flour, baking powder, and salt. 
4. Add the dry mixture to the wet ingredients and turn mixer back on for about 2 minutes. 

To make the topping:

1. In a small sauce pan melt the butter and add the brown sugar.  Stir on low heat for one minute.

Put it all together:
1. Spoon a layer of the warm brown sugar mixture into the bottom of each muffin tin, then place a pineapple ring on top.   

(If you’re using regular muffin tins, a full size ring won’t fit; you can just cut them down into chunks or use pineapple tidbits.) Add a cherry in the middle of each pineapple.
2. Pour cake mixture over the top of your pineapple mixture to fill muffin tin 3/4 of the way. (I put the batter in my 2-cup Pyrex measuring cup and poured it out.)  

3. Bake jumbo cakes for 25 minutes (regular cakes will take about 20 minutes).
4. When a toothpick comes out of the middle of the cake clean, they are done! 5. Remove from the oven. 
6. Let cool in pan for 3 minutes.
 
7. Run a knife or spatula around the edge of each cake to help loosen in case it sticks a little. 
8. Place a wire cooling rack on top of the cakes, and quickly flip over on top of sheet tray to catch extra drippings. 
This was after we flipped them on top of the sheet.


I know they look messy but I'm betting they are yummy!


ENJOY!!

CAKE BATTER CRUNCH BUDDIES 

What you need for Funfetti Cake Batter Buddies:
7 cups Chex cereal (I used Corn Chex, but any variety will work!)
10 oz (5 squares) vanilla flavored Almond Bark (do not substitute white chocolate chips- they just do not melt as well)
1 1/2 cups Funfetti cake mix
1/2 cup powdered sugar
1 tsp vegetable shortening
3/4 cup mini marshmallows (optional)

To make your buddies:
1. Measure out your cereal in a large (and I mean BIG) mixing bowl.
2. Melt the almond bark according to the package directions. I added the vegetable shortening about half way through the melting to help thin it out.
3. Drizzle the melted almond bark over the cereal. Mix gently with a large spoon or spatula (I coated my spatula in Crisco so it would mix easier and not break all the cereal.)
Tossed with the almond bark

4. Now you can transfer your chocolate coated cereal into a large Ziploc bag, or just continue to use your bowl and spoon/spatula but you need to toss the funfetti mix and powdered sugar onto the cereal. I chose the bag route as I like to shake it up and I think it mixes better this way. Just be sure your cereal gets evenly coated.
5. As a final option, I thought tossing in some mini marshmallows would be fun. The recipe didn't call for them but they went with the white, bite-size theme and I thought it seemed like a cute idea!


ENJOY!!

Sunday, August 5, 2012

Hail Caesar!! Chicken Caesar Pizza

CHICKEN CAESAR PIZZA
Alright everyone, time to break the dessert baking trend! I’m blogging about my first savory recipe today! And oh my gosh, this was hands down the best thing we have ever made! When Danny and I were in Florida on vacation, we went to a place called Mellow Mushroom. It was the most amazing pizza…completely different flavors and ideas than you would ever think about for pizza. Our favorite was the chicken Caesar. It was awesome! Cheesy, buttery, garlicky pizza with a Caesar salad on top. We actually went there two nights in a row it was so good! When one of our sets of plans was canceled we decided it couldn’t get much better than MM and that is when we discovered this gem. We’ve been in withdrawal since coming home because there isn’t one around us so of course, we went on our quest for a copycat recipe. I am so excited and ecstatic to tell you that on our first try- we nailed it! That never happens…the first time is always rough and full of ‘next time, we’ll do this instead’. Not yesterday!! I hope that one of you will enjoy this as much as Danny and I did :) I will separate the crust recipe from the toppings so you can top it however you wish. The crust was out of this world and I must give props to www.food.com for the ‘easiest best focaccia bread recipe’ as this was hardly tweaked at all! If Caesar salad and pesto isn’t your cup of tea I would still recommend trying this crust recipe and topping it with whatever you please. If you’re up for a completely new twist on pizza though, then give this a shot! (Side note: this is NOT a healthy recipe, you can modify if you wish but I won’t promise the same amazing results. The reason this is so good is because it’s super buttery…just don’t eat lunch ;)

What you’ll need for the crust:
2 3/4 cups all-purpose flour
1 teaspoon salt
1 teaspoon white sugar
1 (1/4 ounce) packet active dry yeast
1 teaspoon garlic powder
1 teaspoon oregano
1/2 teaspoon dried thyme
1/2 teaspoon dried basil
1 dash ground black pepper
1 tablespoon vegetable oil
1 cup warm water (105-115 degrees)
2 tablespoons olive oil
2 tablespoons parmesan cheese (I used the Kraft crumbly kind for this because I think it bakes better on the dough)
2 tablespoons butter (for the pan)
Crisco (for the pan)

To make the crust:
1. Mix the yeast and water in a small bowl. Let proof for 10 minutes (until bubbles begin to form).
2. In large bowl, stir together flour, salt, sugar, garlic powder, oregano, thyme, basil, and black pepper.
3. Add the yeast mix and vegetable oil to the dry ingredients and combine.
4. When dough has pulled together, turn out onto lightly floured surface and knead until smooth and elastic.
5. Lightly oil a large bowl, place dough in bowl; cover with damp cloth and let rise in warm place 25 minutes.
6. Preheat oven to 425 degrees.
7. Prepare the baking sheet or pizza pan (we use a deep dish pizza pan) by greasing with Crisco; then melt 2 tablespoons of butter in the bottom (like I said, this isn’t healthy).
8. Punch dough down, form into whatever shape you please about 1/2 inch thick (we did a circle for pizza pan); place on buttered and greased baking sheet.
9. Brush top with olive oil, then sprinkle with Parmesan cheese.
10. Bake for about 8 minutes until starting to bubble; then take it out so you can put on your toppings. (Caesar topping recipe below.) Put back in oven and bake for another 6-10 minutes until golden brown and cheese is bubbling.

What you’ll need for the chicken Caesar toppings:
1 chicken breast
1 tablespoon of olive oil (for chicken)
~1/2 cup Basil Pesto (I used the Classico brand)- I’m not sure exactly how much we used but you’ll need some for cooking the chicken and some for the pizza crust
2-3 cups shredded Mozzarella cheese (we used fresh- it melts so much better)
1 cup shredded Fontina cheese
1/2 cup crumbled feta cheese
1/4 cup olive oil
2 large cloves of garlic
1 head romaine lettuce
Caesar dressing
1/4 cup shredded Parmesan cheese

To make the chicken Caesar pizza:
1. Get a sauté pan very hot to cook the chicken. Use about a tablespoon of olive oil in the bottom and start the chicken breast. Flip once about 3 minutes in; cook another 1-2 minutes. Take chicken out of pan (it won’t be cooked all the way through) and slice into thin pieces.
2. Put the chicken slices back in the pan and top with about a 1/4 cup of pesto. 
3. Turn heat up in pan (to get a nice sear) and cook until the chicken is done (about 4-6 minutes more). Make sure the chicken has a nice golden color to it. Turn chicken off and leave in pan until you’re ready to top your crust.
Our golden pesto chicken
4. Crush the two cloves of garlic and mix with the olive oil; sauté in a pan or heat in the microwave to cook the garlic for a bit (not long; 2-3 min sauté or 30 seconds in microwave).
5. After the dough is close to done baking (about the 8-10 minute mark) take it out the oven and use the garlic oil as the sauce. Spread it around evenly across the top of the crust.
6. Coat with some pesto (we probably used another 1/4 cup but it's up to your preference) as additional sauce. 
Here is the crust with the sauce; you can tell that it's not quite done yet because the edges are not golden


LOTS of cheese!!


7. Place slices of chicken on top of the sauced crust.
8. Top with the shredded cheese. 
9. Put back in oven and finish baking. (We did about 5 minutes at 425; then broiled on high for a final 5 minutes until the cheese was golden and bubbling.)


Right after it's come out of the oven


10. While your pizza is finishing 
it’s bake, cut the head of romaine and toss with the Caesar dressing and shredded parmesan cheese.


Danny's making a guest appearance in my blog!

11. When your pizza is all done baking, take it out and let it rest for a few minutes (we also soaked up a little extra oil/grease with paper towels from the top). Then slice into triangles and top with the Caesar salad. You’ve now made the most magnificent pizza! Crack open a beer or pour a glass of wine and
Topped off with the salad: A-MAZ-ING!!

ENJOY!!

Friday, August 3, 2012

Cups of Cookies?


CHOCOLATE CARAMEL COOKIE CUPS

Hello and Happy Friday to everyone! I hope you’ve all had a good week. I’ve been feeling a little under the weather myself but I’m grateful to have been home for the last week. Because of that, I’ve had some time to do more recipe research and find another yummy treat to share with you. I've been on a cookie cup quest lately and tracked down 3 recipes that I want to try. This is the first of the 3 so you can expect a few more cups of cookie treats to come your way in the near future! :)

To be honest, when I made these last night I was not quite as pumped up as normal because my energy level has been down; however, these little bites are so yummy that it was well worth the effort! I learned quite a bit throughout the process so hopefully my tips will make your first batch more successful than mine! Although, even if they do fall apart they are still scrumptious and you can keep those for yourself! ;)

What you need for the cookie cups:
Mini-muffin tins (pictures below)
1 cup butter (2 sticks) room temp
1 cup dark brown sugar (this makes a difference in flavor so try not to substitute light)
1/2 cup granulated sugar
2 eggs
2 tsp vanilla
2 1/2 cups all-purpose flour
1 tsp kosher salt
1 tsp baking soda
40-50 unwrapped Rolo candies
40-50 waffle-style Pretzels (I used Snyders of Hanover)
*As a note- this recipe made over 50 cookie cups for me so you may need extra Rolos. I ran out so I put a dollop of peanut butter on the top of the ones that did not have a Rolo. Still super yummy!
*Extra note- you could use refrigerated cookie dough if you're short on time and don't want to make this from scratch. Sugar dough would be plain but I bet peanut butter would add a fun twist!

To make the cookie cups:
1. Preheat oven to 350
2. Spray a mini muffin pan with non-stick spray or grease with Crisco (I tried both ways because I was having trouble getting the cups out- I didn’t notice a difference between the two. Just be sure to use a lot!)
3. With mixer on medium, cream the butter and sugars together, mixing until incorporated evenly.
4. Add eggs and vanilla, beating until combined, about 30 seconds.
5. Turn mixer speed to low. Add in your baking soda and salt. Mix in your flour one half cup at a time until just combined. It’s a pretty sticky batter.
6. Form balls of the dough to place in the bottom of your prepared muffin tins. (The first couple of batches I made, the balls were too big and the cookie expanded over the cup into a muffin shape. You want to avoid this because they’re really difficult to get out if it happens. The balls were a bit bigger than a marble…just be sure to give them plenty of room to grow.)
7. Gently press a Rolo into the center of each batter-filled cup. (You do not want the dough to be more than 2/3 as high as the well of the muffin tin. If the dough comes up too high around the Rolo you need to take some dough out.)
8. Bake for 10-12 minutes or until the edges are golden brown; mine took 10 minutes a batch.
9. As soon as they come out of the oven press a pretzel directly on top of the cookie cup into the melted chocolate of the Rolo. I used a fork to do this; some of the caramel will ooze out but that makes them yummier!
10. Let sit on a wire rack in pans for about 10-15 minutes to cool and then try to remove from pans. If they are the height of the tin (and did not muffin-top over) they will be pretty easy to get out with a small knife or spoon. Just gently loosen the edges of the cookie from the pan and it should pop out. If you do end up with a bit of a muffin edge, they will be a little messy but like I said, they still taste great!


Here are some pictures of the process:


This is my first batch- there is too much dough in these and they overflowed into muffins! 


This was the second batch- better but still a bit much on the dough.


Third time is a charm! These turned out just the right size. Take note that after the Rolo has been pushed in there is still a lot of room left in the cup!


Yum!! This is what they look like before trying to take them out. Notice there is no 'muffin top'. The little knife to the right is what I used to loosen them from the sides of the pan.

ENJOY!


Thursday, July 26, 2012

Minnie's Crunchy Peanut Butter Bars

Hi Friends!! I know it’s been forever since I last blogged and I am truly sorry. Despite the blistering heat which makes it difficult to bake anyway, I have actually been traveling the last three weeks and was home for about 2 days in between. That just didn’t leave much time for baking or cooking so I have some making up to do! Today’s recipe is in honor of one of Danny’s co-worker’s birthday! They are celebrating tomorrow and the theme is about furry friends (I think perhaps she likes squirrels??) so they asked for nutty treats ;) A cute idea since I just love themes! Since I just mentioned ‘furry friends’ though I thought I’d sidetrack for a few minutes and tell you a little story about an incident that took place at our house this weekend! (Recipe is down below if you want to skip this story!) 

Danny and I just got back from a 10 day vacation to Florida and Tennessee this past weekend. We returned on Saturday and did some unpacking, laundry, grocery shopping etc. to get organized around the house. On Sunday, per our normal tradition, we were planning to make a big meal that we leave out most of the day (for lunch and dinner) to snack on while we watch the NASCAR race. We were planning a Mexican meal and had marinated chicken and steak in my mom’s fajita marinade (which by the way is out of this world so I’ll be sure to share in another post!) I was making guacamole, shredding cheese and cooking up rice, peppers and onions while Danny went to light the grill and get the meat started. I’m wrist deep in avocado goo when he starts knocking on the kitchen window telling me he ‘needs some help outside’. I knew something weird must be up because I can’t even open the grill when it’s on let alone light it or cook on it. (Call me a baby but I’m terrified of that thing!) So I go outside and he shows me what he’s found: a big nest underneath the grates which is now home to three teeny tiny babies of some sort. When I say teeny, I mean teeny; they were smaller than my thumb, shaking and squirming a bit. To be honest, they were quite cute but I think they were frightened. I’m sure it had been so dark and quiet out there for the last two weeks and now Danny opened up the lid to a full, bright sun and probably scared them near to death! Anyway, I kept telling Danny: ‘the mom is going to be nearby, I just know it. She is going to come back and try to get them so be careful. Where there are babies, there is a mom and she is going to be really mad you found them and probably really mean!’ He doesn’t really believe me on this but since he’s freaking out, I let it slide. Then I told him to call my dad (like that was going to really help anything, but it’s what I always say when there is some problem that we don’t know how to solve! Plus, my dad has a heart of gold when it comes to little critters so I figured he would know how to coax Danny through this.) So Danny’s on the phone with my dad, getting some garden shovels and gloves so he can figure out a way to remove the nest and I’m standing over by the grill being nosy.

I wish you all knew my husband…like really knew him because you would then understand how difficult this type of situation is at our house. Now Danny can kill a spider and other sorts of bugs but it is NOT his favorite thing to do. He is quite possibly the jumpiest, squirmiest man I know when it comes to critters. He will jump backward like an Olympic athlete when there is a small animal or large bug in close proximity. He does NOT like when these things happen and unfortunately it’s a pretty regular occurrence at our house: We have a basement and one of the windows has a well as a fire escape so quite frequently we have shrews that fall between the grates and cannot get out. It will take Danny over an hour to remove one because every time it moves, he jumps backwards, hits something and yells at it…then starts again. So please imagine my husband: on the phone with my dad a good 8 feet away from the grill with shovels in both hands trying to figure out what he’s going to do. I’m standing about 6 inches from the grill peering over to see if there are any more babies when BAM in my face is a set of big eyes and whiskers! It took me at least a half a second to put two and two together to realize it was a giant mouse sitting there looking at me! This whole time I had figured they were shrews because of the incidents I mentioned above so when I saw this thing, I don’t think it clicked right away! So I scream, ‘IT’S THE MOM!!’ and Danny jumps back another 5 feet from the grill and tells my dad he’s ‘gotta go!’

At this point, I finally started laughing- is this really happening?!  I was also soo excited that the mom came back for them! Danny’s now so far away from the grill he can’t see anything…he’s asking me ‘what’s happening? What is going on?’ My momentary shock subsided and I moved right up to the grill again because I wanted to see what she was gonna do. And God love that little mousey mom- she picked up one of the babies and put it in her mouth and carried it down her secret path through the grill to the deck and then went right underneath it. Not three minutes later I saw her come out from under the deck, back through the grill, up to the top and picked up the second one. She did this one more time until all three of her babies were back under the deck safe and sound! It took all of 10 minutes. I know you think I’m crazy for watching this whole thing go down and because I think it was cute but I just couldn’t believe my eyes! That this little mouse (I named her Minnie- hence the reference in the recipe title) took action that fast and had a plan to protect her babies :) Danny is furious that they are now under our deck but at least it made his job a bit easier- removing an empty nest doesn’t require any jumping! :)

Sooo, back to my nutty treat post! I searched for a bit looking for something with pecans or cashews since I know Danny likes those but actually ended up with something my mom suggested. I was in Chicago earlier this week trying to make a flight to Victoria and she showed me some peanut butter bars in a ‘back to school’ recipe book she had picked up. They looked quite tasty and pretty simple so I thought I’d give those a try. When I got home, I looked up the recipe online to see what others were saying about them. Most complaints were regarding the crust so I found a totally different crust to substitute in its place. Since this recipe is now a hodgepodge of a bunch of things- I’m not completely sure how it is going to turn out but I’ll let you know!

What you need for the bars:
CRUST:
14 Tbs. unsalted butter, melted and cooled to just warm
1/2 cup granulated sugar (after a taste test, I would add more sugar to make the crust sweeter- probably 1/4 cup more)
1/2 tsp. table salt
2 cups plus 2 Tbs. unbleached all-purpose flour
1/2 cup unsalted peanuts, finely chopped (you could use the food processor)

TOPPING:
1 cup crunchy peanut butter
6 Tbs. unsalted butter
1 tsp. pure vanilla extract
1 cup (6 ounces) semisweet chocolate chips
1-1/2 cups crushed cornflakes

To make the bars:
CRUST
1. Line a 13x9-inch metal baking pan with foil, letting the ends create an overhanging edge for easy removal. This works really well and makes your life easy for removal and cutting of the bars.
2. In a medium bowl, stir together the butter, sugar, and salt. Stir in the flour and peanuts to make a stiff dough. Press the mixture evenly into the bottom of the prepared pan. Prick the dough all over with a fork.
3. Place a rack near the center of the oven and heat the oven to 325°F.
4. Bake the dough for 20 minutes; then decrease the oven temperature to 300°F and bake until the crust is golden brown all over and completely set, about 10-15 more minutes. Let the crust cool completely before topping.
TOPPING
5. In a small saucepan, melt the peanut butter, butter, vanilla extract and chocolate; stir thoroughly.
6. Take off of heat and mix in crushed cornflakes. Pour over cooled crust.

This is after I poured the topping on the cool crust- before it went in the fridge.
I let mine sit in the fridge for 3 hours to harden and then cut them. The foil worked really well and it was super easy to pull out of the cake pan. Then I ran a knife in between the crust and foil to be sure it wasn't stuck (it wasn't at all) and pushed the bars right off the foil onto a cutting board.
This is a side angle view of what it looked like after it came out of the pan!
After a little taste test, I think they are pretty good. I would add more sugar to the crust recipe the next time I make them though- it could be sweeter!


ENJOY!

Friday, June 29, 2012

Strawberry Pretzel Special

Hello y’all! Boy oh boy has been a hot couple of days!! It is almost sinful how warm it is out there. Unless you’re sitting poolside with a margarita, it is not my cup of tea! However, I am very grateful to live in a home with air conditioning and work in a building that is cool (usually cold!) every day. With the weather advisories and warnings out there on this heat, it would be just wrong to light the oven so I’ve got a sweet, satisfying, summer treat to share with you! It only requires one small amount of bake time and I did this first thing in the morning so that the house would more than cool off by the time we got home! Danny and I love this little dessert and could probably eat an entire pan of it on our own in one weekend. But, we’re having a couple of friends over for a barbeque this evening and I thought sharing it among 4 will be much better than making a whole batch for just us! The first time I had this was in college from the dorm cafeteria (I know that sounds gross but the dorm food really wasn’t bad!) I had never even heard of strawberry pretzel salad but since the name had ‘salad’ in it, and I’m a health nut, I thought I’d give it a try. Boy was I ever wrong about this being healthy!! Who came up with the name salad for this?! I don’t think there is even one part of it that can be considered salad, except maybe the Jell-O but I don’t know who made that rule either. Salad is green, crunchy, leafy…not made with whipped cream and sugar! Regardless, it is amazing and I can’t get enough on this hot, humid days.  So without further ado, I’ll share my twist on this summertime sweet!

STRAWBERRY PRETZEL SPECIAL  (doesn’t that sound so much cooler anyway?!)
What you’ll need for the Special:
Crust:
-2 cups crushed pretzels
-3/4 cup butter, melted
-3 tablespoons white sugar
Cream Layer:
-1 (8 ounce) package cream cheese, softened
-1 cup white sugar
-1 (8 ounce) container frozen whipped topping, thawed
Strawberry Layer:
-2 (3 ounce) packages strawberry flavored gelatin
-2 cups boiling water
-2 (10 ounce) packages frozen strawberries or 2 1/2 cups fresh strawberries

To make the Special:
1. Preheat oven to 400 degrees F (200 degrees C).
2. Crush your pretzels; if you measure out 2 cups whole you will probably end up with more crushed but you can just take out what you need at the end. I crushed them in a Ziploc bag with a mallet. Be careful not to turn it into crumbs… you want the pieces be like little beads so they are still crunchy when you get a bite! (I have some pictures that I'll post later!)
3. Stir together crushed pretzels, melted butter and 3 tablespoons sugar in a bowl; mix well and then press the mixture into the bottom of a 9x13 inch baking dish. I sprayed the baking dish with Pam just to be safe.
4. Bake for 8 to 10 minutes, until set. Set aside to cool.
5. In a large mixing bowl, cream together the cream cheese and 1 cup sugar. 6. Fold in the whipped topping and continue mixing.
7. Spread the cream mixture onto cooled crust. Be sure to spread it to the edges to seal off the crust. I’d pop this in the fridge while you start your strawberry part.
8. Next, dissolve the gelatin in 2 cups boiling water; be sure you use a big bowl since the strawberries need to fit in there! Stir in still frozen strawberries and allow for it to set briefly. 
9. When mixture is about the consistency of egg whites, pour and spread over cream cheese layer. Then put it back into the refrigerator for a few more hours until it’s set up!

I have a couple of pictures that I'll post when I have some more time!

ENJOY

Thursday, June 28, 2012

Having A Ball! ...a cake ball ;)


Disclaimer: I had every intention of posting this last night but it got super late and I had to go to sleep! Sorry it's a few hours past due ;)

Happy Wednesday Everyone! I’m in the process of another baking adventure and while I’m in one of the two cooling stages, I thought I’d start typing up my post! You can call me a cheater tonight because I’m using almost everything out of a box or tub but I sort of decided to do this at the last minute and decided it would be the quickest way and still get to sleep tonight! I also had a baking mix that I’ve wanted to use for quite some time but never had so I decided tonight was as good as ever. I know I’m pretty crazy for lighting the oven on a 94 degree evening but since tomorrow and Friday are supposed to be even hotter, it was probably my last baking escapade this week! (Although, I do have a mostly no-bake dessert to make on Friday so you’ll see at least one more post this week!) Tonight is the first time I’ve ever tried making a ‘real’ cake ball. You see I do have one of the super cute Babycake Makers (similar to my Whoopie Pie maker) but the first cake balls my husband ever had were of the crumbled-cake-mixed–with-frosting variety, thus those are the ‘real version’! I had never even heard of these tasty tots until I moved to Indiana! I have to say I typically prefer my babycake pops better because it is a pure cake ball with some sort of frosting or chocolate on top but I thought I might as well give these a whirl! The other reason I tried this recipe is because the box mix I am using is a quick bread and I wasn’t sure how that would turn out in the baby cake maker since it can be a bit finicky about the mixes at times. Okay, first cool time is over…be back in a bit!

Whew! This recipe is not one to make when you’re in a snacky mood or fixing for something sweet! It’s so easy to steal a bite here and there and now my whole workout is out the window! Oh well, at least it seems as though they’re tasting yummy! So enough of my rambling, let’s get on to the recipe!

CRANBERRY VANILLA CAKE BALLS

What you need for the cake balls:
1 box of cranberry quick bread (I used the Trader Joe’s variety but it appears that Pillsbury has one, too)
The recipe on the box then calls for:
1 large egg
1/3 cup of vegetable oil
1 cup of water
You'll also need 1 tub of vanilla or cream cheese frosting (I had Duncan Hines Vanilla on hand)
12 oz Wilton candy melts or white chocolate chips
(If you want to turn these into cake pops you will need lollipop sticks)

To make the cake balls:

  1. Pre-heat your oven to 350 degrees F.
  2. Grease and flour an 8 inch loaf pan. (I actually used a 10 inch round because I thought it might turn out a little less dense than the loaf pan but I have no proof of this!)
  3. Mix together the baking mix, egg, oil and water with a wooden spoon until just combined (this won’t take long).
  4. Pour batter into your prepared baking dish and bake for 40-50 minutes until a toothpick comes out clean.
  5. Let the cake cool completely on a wire rack (probably about an hour- I hurried this along by putting it in the fridge after about 20 minutes because I was a bit short on time).
  6. Once the cake is cool, crumble it into a large bowl (this is so hard to do when the cake looks so pretty the way it is!)
  7. Now you’ll mix in the frosting…I found several variations among recipes as to how much you’re supposed to put in there. Most of them say it depends on how moist your cake is but that most likely you wouldn’t use the entire tub. I used about 80% of the 15.6oz jar (and took a few spoonful’s for myself along the way ;)
  8. Now for the fun (or gross part)! You can use a spoon to combine the cake with the frosting but I thought using my hands was a bit easier.
  9. Once it’s thoroughly combined, I popped mine back in the fridge for about 15 minutes so they would be a bit firmer. (You can skip this step if you want.) Then form the mixture into small balls on a cookie sheet. Honestly, it looked like cookie dough to me before you put them in the oven! 
  10. Now pop them back into the fridge or freezer for about 30-60 minutes so they can firm up before you dip them.
  11. While they’re cooling, start to melt your white chocolate on low in the microwave stirring frequently until it’s smooth.
  12. Take your cake balls out of the fridge or freezer and dip them into the melted chocolate. I actually put chocolate on a spoon, placed the cake ball on the spoon and rolled it around. It seemed like it was more evenly coated than just plopping them in the whole bowl of chocolate. Place back on the cookie sheet so they can cool completely (however, they will have a ‘flat’ side if you set them on the sheet). I wasn't going for gorgeous with this recipe so it was okay with me that they were not completely uniform.
If you want to turn these into Cake Pops (and keep the full circular shape) you can follow these easy steps:  
Use a skewer or a toothpick to poke holes in the balls after they come out of the freezer;
Dip the end of a lollipop stick into the melted coating, and stick it into the hole you just created. (The melted coating will help hold the stick in the cake pop.)
Once all of the cake balls are on sticks, it's time to dip them.  Hold one end of the lollipop stick and submerge the cake pop completely in the melted coating. Take it out and gently tap it and swirl it upside down to remove excess coating.
You can either place them on wax paper (getting the flat top) or buy some block Styrofoam and place the sticks in the block right side up. You may still have a little dripping of the frosting but I say it gives them character!

ENJOY!