Sunday, October 19, 2014

Halloween Bark

Happy (almost) Halloween!! With the holiday only being a couple weeks away, I thought I'd post a fun and festive treat for you all to try. I first found this recipe on pinterest but I altered it a little to make it my own. You can mix up the ingredients however you like but I thought this version tasted good and also looked pretty (or scary, depending on your perspective!) This would be a great treat for a Halloween party or office snack.

What you need to make the bark:
1-1lb package of white almond bark (add 1 tablespoon of Crisco)
1 cup stick pretzels, broken up into pieces (but not crumbs)
1 cup salted peanuts
12-14 Halloween Oreo's, crushed and broken into small pieces
1 1/2 cup candy corns
2-4 tablespoons Halloween sprinkles (eyeballs or other fun Halloween shapes)
To make the bark:
1. First, break up your pretzels and cookies. I put the pretzels into a ziploc bag and used a rolling pin to break them up. I also put the Oreo's in a baggie but used my hands to break them up so they were more chunky (as opposed to cookie crumbs). 
2. Next, I chopped up the almond bark and started melting it with the Crisco in a sauce pan over low heat. 
3. Line a large jelly roll pan or cookie sheet with parchment paper. I layered all the pretzels, peanuts and then half the candy corns and half the Oreo chunks on the parchment paper. The next time I do this, I would probably pour the melted chocolate down first and then push the toppings into it.

4. When the chocolate is melted, pour it on top of the parchment paper (with or without the toppings) and spread it around. Push remaining toppings into the chocolate so that when it sets you can break it apart without them popping out or falling off. Use the Halloween sprinkles sporadically around the bark.
5. Let cool outside or in the fridge for about an hour or two and then use your hands to break the bark into smaller pieces. 

TRICK OR TREAT!

Saturday, October 11, 2014

Macaroni Salad

Hi Everyone! Hope you're all well and enjoying fall. It's been so great to light some pumpkin candles, turn on the oven to bake and make some good old comfort foods! Today I've got a macaroni salad for you. We made this as a side to a grilled meal but you could use it any time. It's really easy to whip together and goes with just about any protein. Feel free to use whatever veggies you like...this was just my rendition for today and I'll probably switch it up often!

What you need for the macaroni salad:
1 1pound box of elbow macaroni
6 green onions, sliced thin
3 stalks of celery, cut into small chunks
1 red bell pepper, cut into small pieces
1/2 of a seedless cucumber
Cherry tomatoes
**One thing Danny suggested after the fact was that cubed up pepperjack cheese would have been a good addition...I may go ahead and add this later today as I have a block in the fridge!
For the sauce:
1 cup mayonnaise
1 tablespoon dijon mustard
1 tablespoon red wine vinegar
2 tablespoons sugar
Salt and pepper to taste

To make the macaroni salad:
1. I started by bringing a large pot of water to a boil with a little oil and salt. Cook the box of macaroni until al dente- about 12 minutes.
2. While the pasta is cooking, chop up your veggies. This is easy but time consuming so just bear with it. I put all the veggies in a very large mixing bowl that I could easily add the macaroni and sauce too when it's ready.
3. Next, I mixed up the sauce by combining all the ingredients listed above. 
4. Drain your pasta when ready and rinse with cold water while in a colander.
5. Mix the macaroni in with your veggies and then add the mayonnaise sauce. Stir to combine and place in the fridge for an hour or so to get it nice and cold.

ENJOY!!

Saturday, August 2, 2014

Chocolate Strawberry Layer Cake

This recipe was a real treat a couple weekends ago! Our new niece was baptized so I made this cake as our celebration sweet for the party. It uses yogurt in the cake- which you don't necessarily taste but it definitely adds moisture. And the frosting is awesome! It takes a little time to assemble but you can easily prep your ingredients in advance so it shouldn't be difficult or extremely time consuming. It's an impressive looking cake that doesn't require as much as it looks like! I was also excited to give my new Kitchen Aid mixer a try! This was a joint birthday/anniversary gift from the hubby and I was itching to put it to work!

CHOCOLATE STRAWBERRY LAYER CAKE

What you need for the cake:
1 box chocolate cake mix
3/4 cup water
1/3 cup vegetable oil
1 container strawberry Greek yogurt
3 eggs
Frosting and Decorations:
1 container of fluffy white frosting (it's the whipped kind)
1 container of frozen whipped topping (thawed)
mini chocolate chips
1 container of fresh strawberries, rinsed and dried
To make the cake: 
1. Pre-heat oven to 350 (325 for dark pans). Grease and flour two 9-in round cake pans (or use parchment paper rounds). 
2. Mix all the cake ingredients together in a bowl until combined. Beat on medium speed for 2 minutes. (Check out my new mixer!!)
3. Pour batter into prepared pans and bake in the oven according to package directions (probably about 25-30 minutes).
4. Remove from oven and let cool for at least 30 minutes; then remove from pans to a wire rack until you're ready to assemble the cake.
5.To make the frosting, add the fluffy white frosting to a bowl and fold in the whipped topping.
6. Cut about 10 strawberries into 1/4 inch slices.
7. When ready to assemble the cake, place one cake (rounded side down) on a serving plate. Spread 1/3 of frosting mixture to the edges of the cake. 
8. Arrange strawberry slices evenly over this cake. Sprinkle with about 1/4 cup mini chocolate chips. 
 9. Place second round cake on top of the strawberries, this time rounded side up. Use the rest of the frosting to frost the top and edges of cake. 
10. Decorate the top of the cake with more strawberry slices and rim the edge of the cake with mini chocolate chips. 


Slice and ENJOY!
Bonus picture of Betty- who likes to be anywhere there is frosting!


*Be sure to store leftovers in the refrigerator.*
This recipe was adapted from: http://www.pillsbury.com/recipes/chocolate-strawberry-cake-with-fluffy-frosting/f3186840-6879-406a-ab3a-84e9be12d89a

Tuesday, July 22, 2014

Buffalo Chicken Dip

Here's a recipe that I should have posted a LONG time ago! It's always a hit at almost any get together and really easy to make. I suggest this appetizer almost as frequently as my spinach artichoke dip! You can mix and match cheeses and use whatever you like for dipping- celery sticks, pita chips, even put it on a croissant!

BUFFALO CHICKEN DIP

What you need for the dip:
2 boneless, skinless chicken breasts; cooked and shredded
1 package (8oz) cream cheese, softened
1/2 cup Frank's Red Hot Sauce (or whatever spicy wing sauce you like)
1/2 cup ranch dressing (you could also use blue cheese if you prefer)
1 cup of shredded cheese (I usually use half mozzarella, half cheddar)

To make the dip:
1. Pre-heat oven to 350 degrees.
2. Mix all ingredients together in a bowl.
3. Transfer to a greased baking dish.
4. Bake for 25-30 minutes until hot and bubbly.
5. Serve with your favorite dippers.
Tip- I usually transfer the dip to a mini crock-pot to keep the dip warm while you eat and ENJOY!

Sunday, June 29, 2014

Shredded BBQ Chicken- plus some new kitchen pics!

Hello!! I'm so sorry for my hiatus! We FINALLY MOVED!!! Yay!!! It has been a crazy month- mom had surgery, my brother got married and then we packed up and moved. Whew!! Lots on our plate in the month of May! Then we spent most of June getting unpacked and making this house a home. :) I am finally starting to feel a little settled- well, settled enough to start cooking and baking again! First, I thought I would share a couple pics of the fun stuff that's been going on...
Beautiful bride!
Brother and Sister In Law! :)
My new kitchen!

Sorry for the kitty- Betty insisted on being in all these pics!


Now, let's get down to business with a super easy and yummy summer recipe. Shredded BBQ chicken for sandwiches, wraps, heck-you could even put it on a pizza crust! With the 4th coming this weekend I thought you might be able to use it at one of the cookouts I'm sure you all have planned! Please plan about 4-6 hours for this recipe- you use the slow cooker but it keeps your kitchen cool and it cooks while you work on other things!

SHREDDED BBQ CHICKEN 

What you need for the shredded BBQ chicken:
1 package of boneless, skinless chicken breasts (I usually do about 2lbs which is about 3 large breasts)
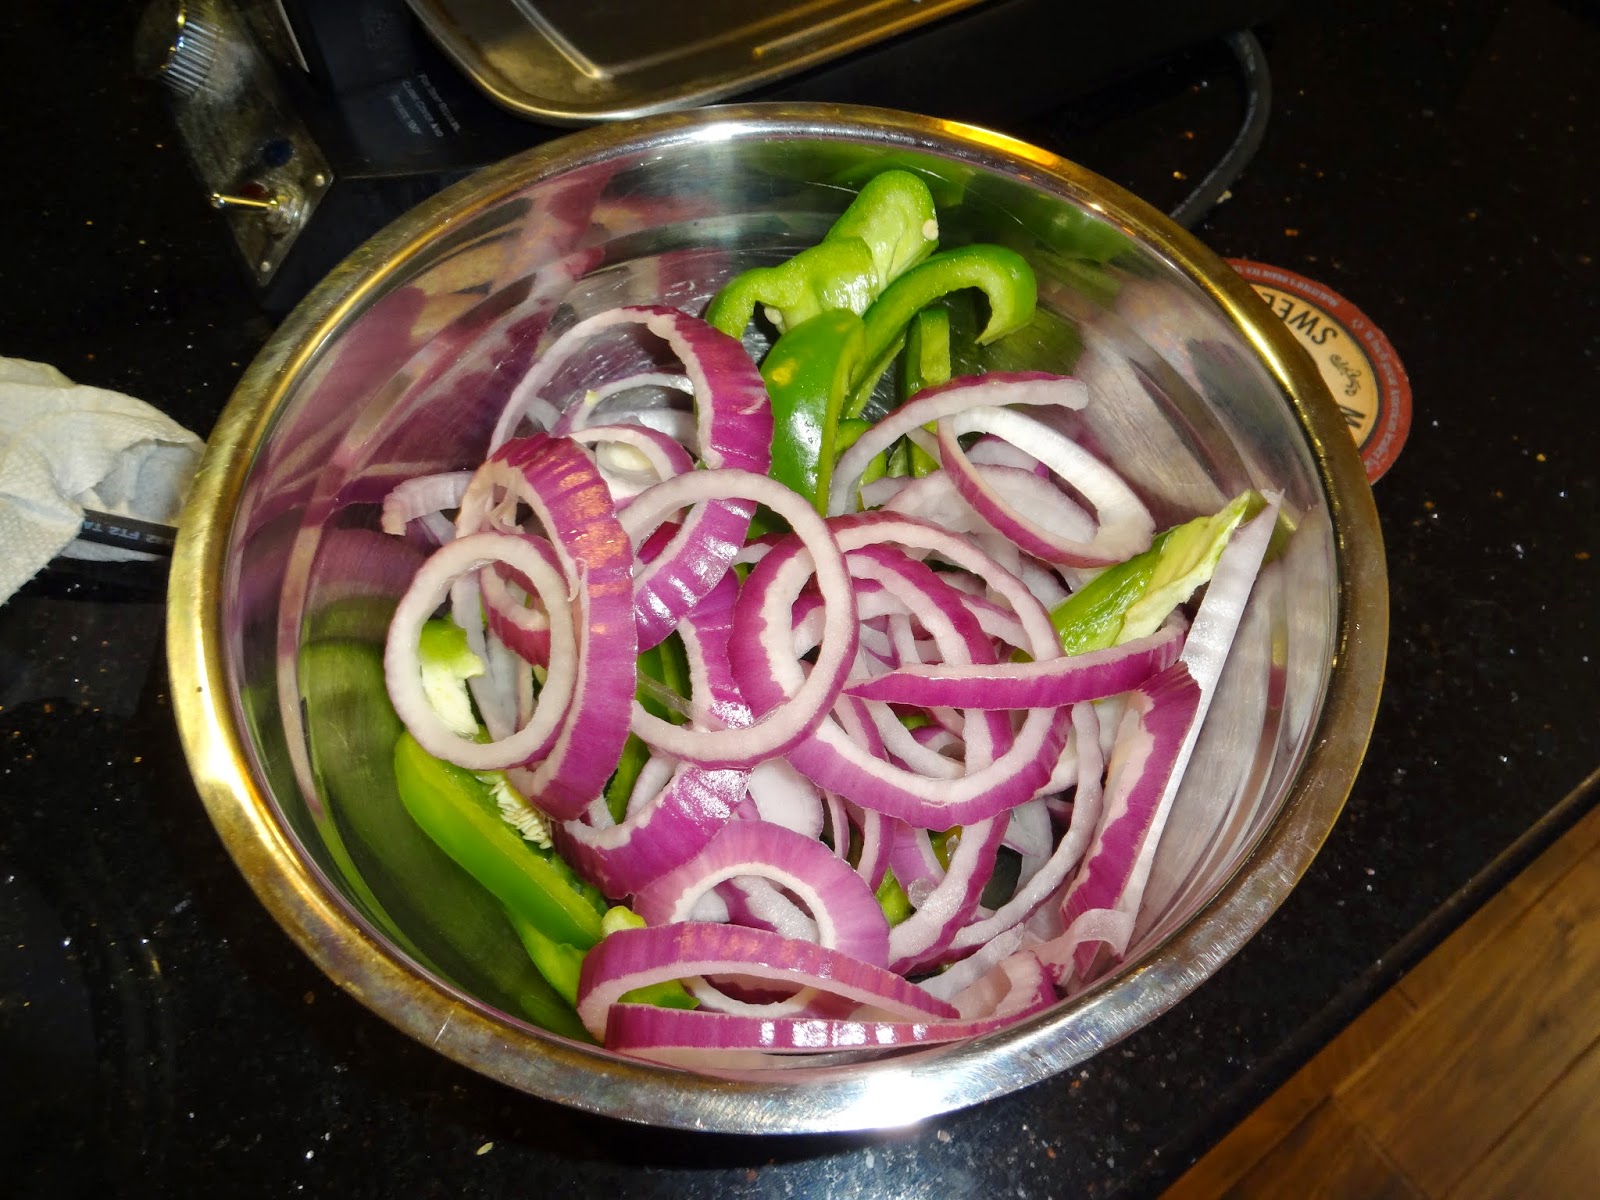
1 green pepper, sliced
1 medium red onion, sliced
1 cup- 1.5 cup Sweet Baby Rays BBQ sauce

To make the chicken:
1. Clean up your chicken breasts and place in the bottom of a slow cooker. Cook on LOW for about 3 hours.
2. Cut up your bell pepper and onion; set aside for later.
3. After about 2 and a half/3 hours of your chicken on low, flip the breasts over and add the onion and pepper. Cook on LOW for another 3-4 hours. (There will be juice in the slow cooker- leave it in there!)
4. I promise you can leave it alone and go do what you need to do -run errands, clean, have fun with company- whatever! In the words of Princess Elsa, just- LET IT GO!
5. At this point, if you've left the chicken cooking on low for about 6-7 hours, it should just fall apart if you put some tongs in there and move it around. 
You could also use a fork or take it out and put it on a cutting board (but why make a mess if you don't have to!) Anyway, just shred the chicken. 
6. After it's shredded, mix it around a bit in the water that was released from the veggies and chicken. If there's still too much, drain some out; I usually get rid of about a 1/4 cup.
7. Add the BBQ sauce and mix around. I usually let this go for another 1/2 hour or so or until I'm ready to serve it up. 
8. Serve on buns or any way you like! Have some slices of cheese around and lettuce and everyone will be happy.
 ENJOY!

Sunday, April 6, 2014

Creamy Tomato Soup

Good Afternoon! I know spring is upon us but I've been wanting to make a good, homemade tomato soup for months now! I love going to Panera and ordering their chunky, flavorful tomato soup with asiago croutons. Yum! It's definitely been warmer here in West Lafayette but the rain showers and dreary days have had me craving a warm soup come lunchtime. So, here's my first attempt at a copycat of Panera's tomato soup. Let me know what you think!

CREAMY TOMATO SOUP

What you need for the soup:
2 tablespoons of olive oil
3 cloves of garlic, crushed
1 yellow onion, chopped
2-28oz cans of peeled, whole tomatoes
1.5 cup chicken stock (or vegetable to keep the recipe vegetarian)
3 tablespoons of sugar
1/4 cup whipping cream (you can use half and half if you don't have heavy cream)
1 teaspoon cayenne pepper (I would use more next time because I like it to have a kick and this wasn't very spicy)
8 basil leaves, roughly chopped
1/4 teaspoon dried oregano
Salt and pepper to taste
2 cups cooked pasta (I used rotini noodle)
To make the soup:
1. In a heavy saucepan, heat olive oil over medium-high heat. Add garlic and sautee for about a minute; then add your onion. Cook until translucent, about 10 minutes.


2. Add your tomatoes- including the juice, chicken stock and sugar. Bring to a low boil, then continue to cook on low (uncovered) for about 15 minutes. 
3. Add the whipping cream, basil, oregano and cayenne pepper. (Sorry, forgot to take a picture here!)
4. Carefully transfer the mixture to a blender, about half at a time, and puree until smooth. (If you have an immersion blender that's much easier and I'm jealous!!) 
5. Transfer pureed soup back to the pot and add your pasta. Cook on low for about another 5-10 minutes. 
 

Already packed up to take to work for the week!
6. Serve immediately with bread or a grilled cheese (yum!!) or store in airtight containers in the fridge for up to a week. You could also freeze some if you like for up to 3 months!

ENJOY!

Sunday, March 23, 2014

Baked Brie

I absolutely LOVE brie cheese. It's got a great, mild flavor and it's very smooth and creamy...bake it up with a berry sauce on top and it's to die for!! This is a super easy recipe you can throw together in minutes and it's sure to impress any crowd! Sorry I didn't take a lot of pictures but I promise it's easy enough that you won't need step by step pics. Give it a try for your next get together!

BAKED BRIE WITH RASPBERRY SAUCE

What you need for the baked brie:
1 large wheel of brie (or 2 small- I always get mine at Sam's Club so I use one large ~16oz)
12-14oz of raspberries (really any berry would work, I like how the raspberries break down so if you use strawberries, you may want to cut them down a little)
3/4 cup brown sugar
1/3 cup water
1/4tsp dried mustard
1/4 tsp ground allspice
1/4tsp ground cloves
1/4tsp ground ginger
Crackers or apple slices for dipping

To make the baked brie:
1. Preheat your oven to 325 degrees F. Line a pie pan with foil or parchment paper.
2. Mix the berries, water and spices in a large sauce pan.
3. Turn them on medium heat and warm until the berries burst- about 15 minutes.

4. Cut the skins off of the top of the brie (I do the tops and sides but leave the bottom)
5. Pour berry mixture on top of the brie and bake for about 10-12 minutes, until the cheese is hot and melty.
6. Serve with crackers or apple slices.

ENJOY!

Saturday, March 1, 2014

Broccoli, Cheese and Rice Soup

Hi Everyone! I wish I could say 'Spring is in the air! Let's make a fresh, springy recipe to celebrate the warmer temperatures! Unfortunately, we're on the brink of expecting another 5-6 inches of snow tonight into tomorrow. I'm sure I speak for everyone in the Midwest when I say that we're SO sick of this weather! Since more cold weather is upon us, I thought another comfort classic was in order. I don't know about you, but I love broccoli cheese soup! Whenever we go to Panera it's pretty much a given that this is part of my you-pick-two. I found this recipe for broccoli cheese and rice soup about 2 years ago and I've been making it every winter since! Sometimes we get bread bowls to serve it in, or just have a breadstick on the side. Even just plain is really yummy, too! Try this recipe out while you're snowed in at home over the next few days; I promise you'll keep this one in your recipe book for winters to come!

BROCCOLI, CHEESE and RICE SOUP

What you need for the soup:
1 cup chopped onion
2 tablespoons of butter
1 can cream of mushroom (or whatever your favorite is) condensed soup
1/2 soup can of milk
1 1/2 cup shredded cheddar cheese 
1 1/2 cup cubed Velveeta cheese (I always use the 2% kind but whatever you have is just fine)
3 cups chicken broth (more if you like a soupier soup ;)
20 oz chopped broccoli (I always buy fresh and chop it up but frozen will work, too)
2 cups cooked rice

To make the soup:
1. To begin, get your rice going right away. I always make one cup uncooked which usually results in a bit more than 2 cups cooked but I like the soup a little thicker.
2. While rice is going, melt butter in a heavy duty saucepan; add onions and cook until translucent. 
3. Chop your broccoli and Velveeta while the onion is sauteing. 

4. Once onion is cooked, add condensed soup, cheese and broccoli to the pan. Cook on medium heat until well combined and cheese is melted (about 10 minutes).
5.  Finally, when rice is done, add that to the cheese mixture along with your chicken stock and broccoli. (*NOTE: To make this recipe all vegetarian, use vegetable broth.) 
6. Simmer on low heat for about 30 minutes until soup is to a consistency you like.
7. Serve with chopped green onion, sour cream and/or shredded cheese.

ENJOY!!

Saturday, February 15, 2014

Strawberry Fudge

Happy Belated Valentine's Day!! I had wanted to post this recipe earlier in the week so you could all use it for your Valentine's Day sweeties this weekend but I ran out of time. I've been traveling for work since Sunday and it was one cancellation or delay after another yesterday at the airports while I was trying to get home! So, my apologies for being a day late, but in Valentine's Day spirit- Roses are red, violets are blue, sorry it's late but this recipe is good!

STRAWBERRIES AND CREAM FUDGE

What you need for the fudge:
2 cups granulated sugar
3/4 cups heavy cream
3/4 cup (1.5 stick)
pinch of salt
12 oz package of white chocolate morsels
7 oz jar of marshmallow fluff
1 tbsp strawberry gelatin mix
Heart sprinkles (optional)
To make the fudge:
1. Line a 9x13 pan with parchment paper.
2. In a large, heavy duty sauce pan, melt the butter. Then add the sugar, heavy cream and salt and stir. Let this come to a boil. 
 3. While bringing that mixture to a boil, pour your white chocolate morsels and marshmallow fluff into a large mixing bowl. Also, prepare your mixer or beaters so they're ready to go.
4. Continue cooking your sugar, heavy cream mixture over medium-high heat until the mixture begins to boil. Once boiling, stir constantly for 5 minutes (I know it sounds long but you need to do it!).
5. Pour the hot sugar, cream mixture over your bowl of morsels and fluff. Beat the mixture until smooth, about 2 minutes. 
6. Pour about half of this mixture into your prepared baking sheet.
7. Add the tablespoon of strawberry gelatin to the remaining mixture in your bowl and beat for one more minute. 
8. Pour the strawberry mixture on top of what's already in your pan and then swirl it around with a knife. I added some fun heart sprinkles to make them more festive while the fudge was still warm (this is so they stick).
9. Refrigerate for at least 6 hours or overnight, then cut into bite size squares. I noticed mine was a bit sticky to cut so warming the knife every few rows seemed to help speed the process along. 


ENJOY this treat with your sweetie!