Tuesday, September 17, 2013

Apple Pie Bars

(Sorry guys...forgot to post this last week so the weather synopsis is a little outdated!) 

So a couple of weeks ago the feeling of fall was almost in the air. Certainly not today, when it's a sweltering 90 degrees here but a few weeks ago, there was a touch of crisp to the air. It got me in the mood for a fall recipe so I made these apple pie bars. They were scrumptious! I'm not suggesting making them this week since it's going to be even closer to 100 (ugh!) but maybe two or three weeks from now when the apple orchards are ripe for picking and you have a bushel to use you can whip up these bars. I kind of made this one up as I went and I didn't write a whole lot down but I think you'll get the gist of it! Have fun!

APPLE PIE BARS WITH CRUMB TOPPING

What you need for the bars:
1 package refrigerated sugar cookie dough
6 tart apples (peeled, cored and diced)
7 tablespoons of flour
1/2 cup of brown sugar
1 1/2 teaspoon ground cinnamon 
1/3 cup water 
3 tablespoons of fresh squeezed lemon juice1 tablespoon cornstarch
1/4 cup preserves (I used apricot)
Crumb topping:
1/3 cup (heaping) all-purpose flour
1/2 cup packed brown sugar
1/3 cup rolled outs
2 teaspoons ground cinnamon
4 tablespoons butter, melted

1. Preheat oven to 350 degrees F.
2. Press the refrigerated sugar cookie dough into the bottom of a 9x13 pan. (I lined mine with parchment paper to make it easier to remove when it was all done but it's okay if you don't.)
3. Next, prepare your apple filling by combining the diced apples in a large skillet or pot on medium heat with your flour, sugar, and cinnamon.
4. Cook on medium heat for about 5-7 minutes until the apples start to soften.
5. Meanwhile, in a bowl, mix your water with the lemon juice and cornstarch.
6. Add your cornstarch mixture and jam to the apples and stir until the mixture becomes thick. This will require cooking for another 5-6 minutes.
7. Pour your apple mixture on top of the raw sugar cookie dough.
8. Prepare your crumb topping by mixing all the dry ingredients with your melted butter with a pastry cutter or fork until combined. 
Sprinkle this on top of the bars.
9. Bake for about 30 minutes until the crust and topping is golden.

 ENJOY!!

Sunday, August 25, 2013

Zucchini Brownies

It's that time of year when everyone is trying to find new ways to use up zucchini from their garden! Luckily I am taking advantage of all the surplus since we don't have a garden this year. I've previously posted chocolate zucchini muffins, and everyone knows about zucchini bread but this time I tried something new- zucchini brownies. I promise can't taste the green stuff...it just makes them super moist. They're also actually quite light and fluffy and a great evening treat! So go on, try this new goody with the excess zucc's you've got sitting on your counter!

ZUCCHINI BROWNIES

What you need for the brownies:
1/2 cup vegetable oil
1 1/2 cups white sugar
2 teaspoons vanilla extract
2 cups all purpose flour
1/2 cup unsweetened cocoa powder
1 1/2 teaspoons baking soda
1 teaspoon salt
2 cups zucchini, grated and drained (I used a paper towel to help dry it out)

To make the brownies:
1. Preheat your oven to 350 degrees.
2. Grease and flour a 9x13 baking pan.
3. In a large bowl mix together the oil, sugar and vanilla extract.
4. In another bowl combine the flour, cocoa powder, baking soda and salt.
5. Mix the dry ingredients into the oil mixture until combined (it might still seem a bit dry). Then fold in the zucchini- this will moisten the mixture. 
6. Spread your batter into the prepared pan and bake for 25-30 minutes until brownies spring back a bit when you touch them.


ENJOY!

Sunday, August 4, 2013

Let's Get Peachy!!

There's not much better than a fresh fruit cobbler. Warm and gooey, slightly crunchy, satisfyingly sweet. Topped with some ice cream or perhaps a little whipped cream? C'mon, I know your mouth is watering! I think I've only made cobbler about twice in my life... I usually leave it to the experts at Cracker Barrel when I'm really craving it. However, I was in the mood for peaches and decided this was a good way to serve them up. I had a little fun with this recipe and added in some fresh bing cherries as well. So yes, the prep work was a bit much but to balance that out, I cooked this recipe in the crock pot. How easy! Serve this up at your next gathering or make it just for you and save the leftovers for a sweet treat all week long!

PEACH AND CHERRY COBBLER

What you need for the cobbler:

5 fresh peaches (you can use frozen if you'd like, probably close to 5 cups)
30 bing cherries (you can use as much or as little as you'd like, this was just what I did)
1/4 cup white sugar
1/4 teaspoon cinnamon
1/8 teaspoon ground nutmeg
1 teaspoon fresh lemon juice
2 teaspoons cornstarch 
Topping
1 cup brown sugar
3/4 cup flour
1/2 cup +2 tablespoons rolled oats (you can eye ball this)
3/4 teaspoon baking powder
3/4 teaspoon nutmeg
1 teaspoon cinnamon
3/4 teaspoon salt
6 tablespoons of butter, at room temperature  (plus a little for the greasing the crock pot)

To make the cobbler:
1. Clean up and slice your fruit. I peeled the peaches with my potato peeler and then sliced them from top to bottom and then in half. I cut the cherries in half, removed the pit and then sliced each half in half (ending up with four slices per cherry). I swear the rest of this recipe is easy after this. To make it faster, I did the fruit prep work the night before and then threw the rest of it together this morning.
2. Mix the next 5 ingredients together in a bowl; then toss with the fruit.
3. Butter the bottom and sides of your crock pot. Add in the fruit.
4. Next, mix up your topping. Combine all the dry ingredients in a bowl, then cut in the butter with a pastry cutter or fork until the mixture resembles coarse crumbles.

5. Pour this mixture on top of your fruit in the crock and turn on low for 2 hours.
At the end of two hours, remove the lid (the condensation can make the topping really soggy) and keep on low or 'keep warm' for another hour. I actually popped mine in the oven for 25 minutes (in the crock, without the lid) at 350 after the 2 hours but you can easily let it go for another hour in the crock pot-whatever you prefer! Serve with ice cream or whipped cream.
ENJOY!!

PS. Here's Teddy lounging while I worked in the kitchen. He has such a tough life ;)
 

Sunday, July 21, 2013

German Chocolate Cake

Happy Birthday To Me!! Well, that was 3 weeks ago now but still, this was my birthday cake recipe so we'll keep the Happy Birthday! :) To be honest, I don't even really like German Chocolate Cake, however we were watching a 'Throw down with Bobby Flay' and the recipe was for this cake. I watched and drooled and decided I had to try my hand at this. I'm not going to lie, this cake required a lot of work and took a long time. However, I was in the mood to bake so I spent the morning on it and believe me, it was well worth the effort!
Happy Birthday to me!
GERMAN CHOCOLATE CAKE

What you need for the cake: 
2 1/4 cups all-purpose flour
3 teaspoons baking powder
3/4 teaspoon baking soda
3/4 teaspoon fine salt
12 tablespoons unsalted butter (at room temperature) plus more for pans
1 cup plus 2 tablespoons good quality cocoa powder
1 1/2 cups light brown sugar
1 1/2 cups granulated sugar
1 1/2 cups brewed black coffee (at room temperature)
1 1/2 cups buttermilk
3 large eggs
2 teaspoons pure vanilla extract 


Topping/Filling:
1 1/2 cups evaporated milk 
3 egg yolks, slightly beaten
1 cup granulated sugar
1 cup brown sugar
2 teaspoons vanilla extract
1 cup butter
2 1/2 cups flaked coconut
2 cups chopped pecans (I think I would have gone lighter the next time; maybe 1.5 cups. I also would have chopped them finer than what they were in the bag.)


Ganache:
8 ounces semisweet chocolate, chopped 
2 tablespoons light corn syrup
3 tablespoons unsalted butter
1 cup heavy cream (in the future, I would go a little lighter with this; maybe 3/4 cup because I would have liked the ganache a little thicker)


To make the cake:
1. Preheat your oven to 325 degrees. Butter and flour two round cake pans and line with parchment paper. (I know this is a tedious process but it's well worth it because your cakes will out cleanly and easily). Also, this is probably pretty obvious to all of you but since I didn't know (had to ask my mom!)-trace your cake pans on the parchment paper and cut out for a perfect fit. 


2. Whisk together the flour, baking powder, baking soda and salt in a large bowl.
3. Melt the 12 tablespoons of butter in a medium saucepan over medium heat. Whisk in the cocoa powder and cook for 1 minute. Remove from heat, add the sugars and whisk until the sugar is dissolved.
4. Next, add the coffee, buttermilk, eggs and vanilla extract and continue to whisk until smooth and just combined. 
Slowly add the buttermilk mixture into the flour mixture until combined and divide the batter evenly between the two pans.
5. Bake on the middle rack until a toothpick inserted into the center comes out with a few moist crumbs attached (but still firm) about 45-50 minutes. Let cool in the pans on a baking rack for 20 minutes. Next, invert the cakes onto the baking rack (should come right out if you buttered, floured and lined) and let cool for at least 1 hour. 
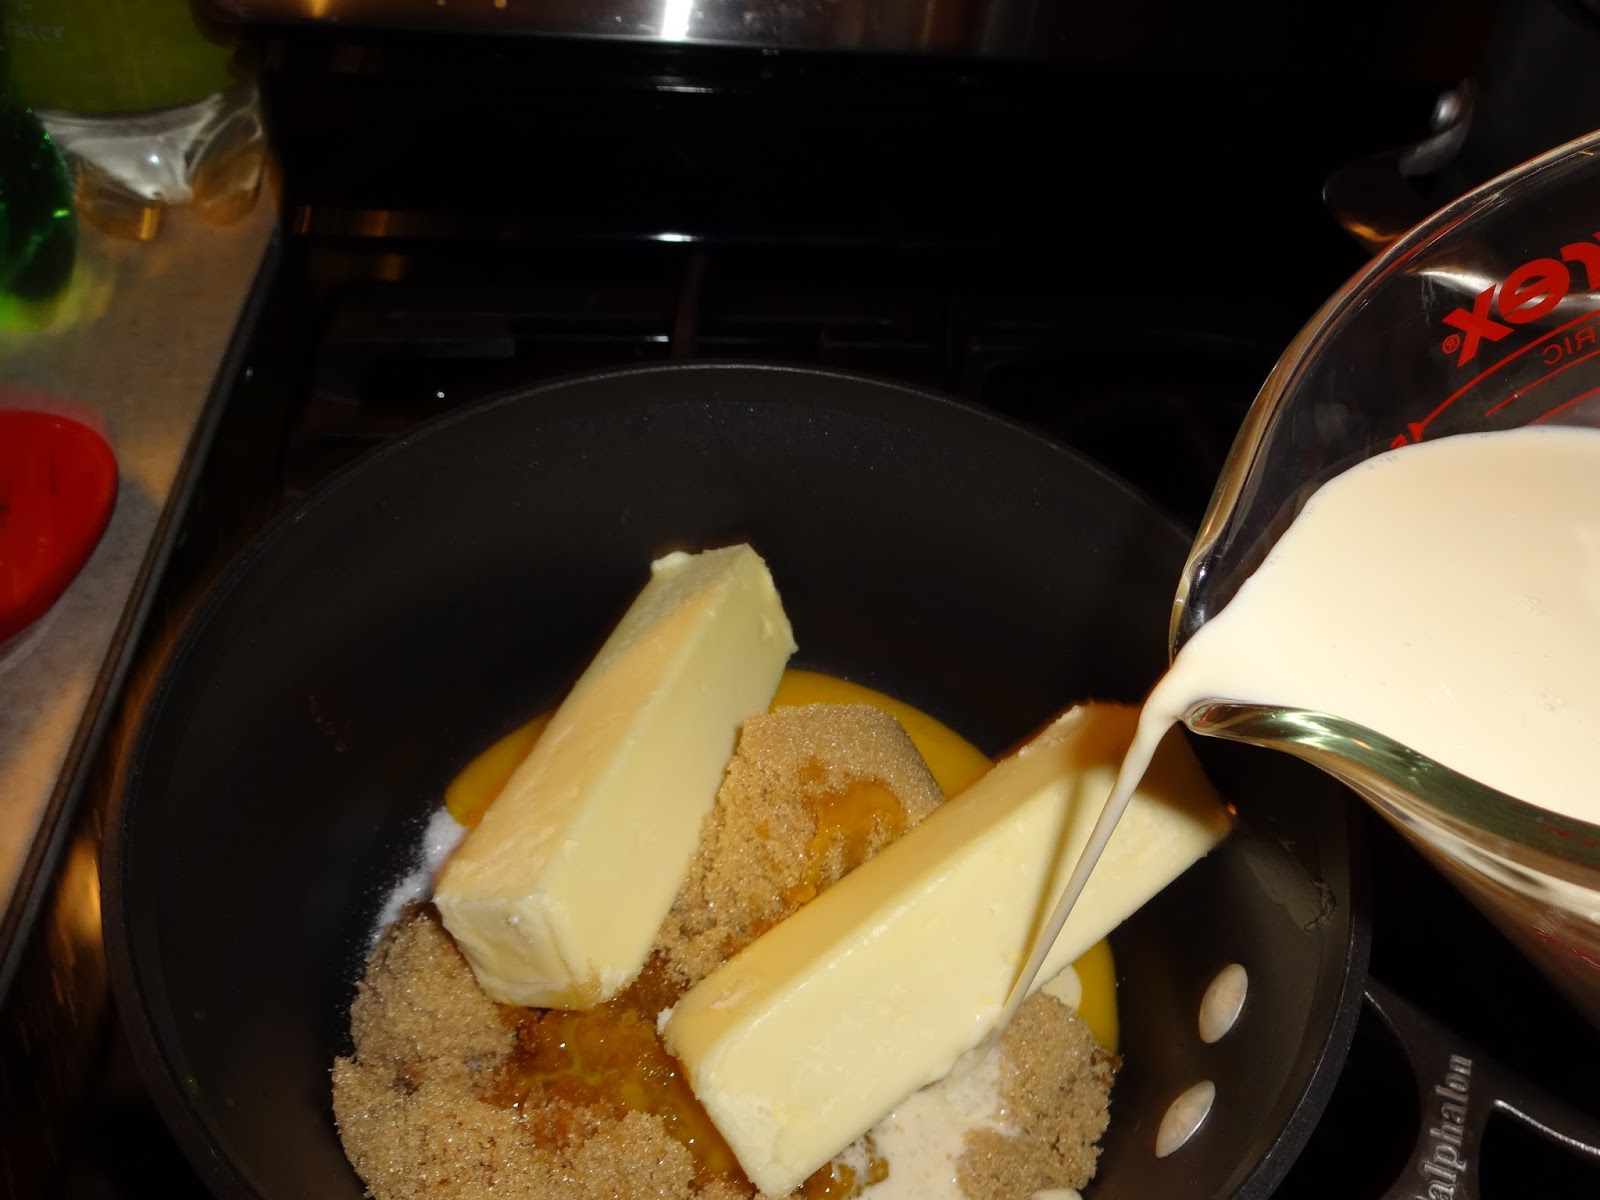
6. While your cakes are cooling you can make the filling by combining the evaporated milk, slightly beaten egg yolks, granulated sugar, brown sugar, vanilla and butter in a large saucepan over low heat. When the butter melts, raise the heat to medium, stirring constantly. The mixture will thicken and bubble after 10 to 12 minutes. 
 7. Remove from the heat. Add the coconut and pecans and cool before frosting the cakes.
8. To assemble the cake, slice each cake in half horizontally with a serrated knife. Put 1 cake layer on a platter or plate and spread 1/3 of the frosting evenly over the top, repeat to make 3 layers and top with the remaining topping/frosting top side up (this means you need to pay attention to which pieces you're stacking...save the prettiest one for the top- even though it does get covered so if you make a mistake, it's okay :) ) 


Cake all assembled without the chocolate ganache.

9. Finally, you need to make the chocolate ganache frosting. To do so, place the 8 ounces of chopped chocolate in a bowl with the corn syrup and 3 tablespoons of butter.
10. In a small sauce pan, heat the cream until it just begins to boil. Turn heat to low and add your chocolate mixture. Stir until just smooth and then remove from heat. Let the frosting sit until room temperature (I then put mine in the fridge to firm up a bit as I was hoping to pipe it...if I had used less cream it would have piped better.)
11. Spread the ganache around the sides of your cake until smooth and all edges are covered. Then pipe or spread a rim of chocolate around the top edge of the cake. 

I'm sorry, I can't get this to turn the right way but you get the idea!
ENJOY!!


Saturday, July 6, 2013

Texas Chocolate Chip Cookies

Happy 4th of July weekend everyone!! As usual, things have been a bit busy around the Hlavek household and with some travel mixed in it's made it difficult to find time for the kitchen. Nevertheless, last weekend I wanted to use up some pantry items so I went on a hunt for a new recipe. I know these sound weird- believe me, I didn't think I'd like them either. However, they are surprisingly tasty, especially the day or two after you bake them! I had so many of these stinking Jiffy corn mixes in my pantry that I just had to use one or two of them up. I figured I would give these a whirl and, worst case, just bring them into work if we didn't like them. That didn't happen- we ate them all up right here!!

TEXAS CHOCOLATE CHIP COOKIES

What you need for the cookies:
4 Tablespoons of butter (softened)
3 Tablespoons of sugar (I did heaping tablespoons)
1 egg
1/2 teaspoon of vanilla
1 Jiffy box corn muffin mix
1 cup chocolate chips (again, I was a bit generous here)
Sea Salt for sprinkling

To make the cookies:
1. Mix your softened butter with sugar. 
2. Mix in the egg and vanilla until combined.
3. Next, add your box corn muffin mix and the chocolate chips and mix until all is incorporated.
4. Refrigerate for about 30 minutes until the dough is stiffened.
5. Preheat your oven to 350 degrees.
6. While your oven is preheating you can start to form your balls of cookie dough on a parchment lined cookie sheet. 
7. Bake for 10-12 minutes until the edges are golden brown. Cool on the cookie sheet about 5 minutes, then transfer to a wire rack. Sprinkle a teeny bit of sea salt on top as soon as they come out of the oven- I swear this makes the cookies!

ENJOY!

Thursday, June 13, 2013

Lemon Bars

Summer is the perfect time for bright, citrus desserts. These lemon bars are light and luscious at the same time. Super easy to throw together and a wonderful addition to any dessert bar. 

LEMON BARS

What you need for the lemon bars:

Crust:
2 cups all purpose flour
1 cup powdered sugar
2 sticks of unsalted butter (room temperature)
1/4 teaspoon kosher salt
Filling:
4 eggs
2 cups granulated sugar
6 tablespoons fresh squeezed lemon juice (about 2 large lemons)
Zest of one large lemon
6 tablespoons all purpose flour

To make the lemon bars:
1. Start by preheating your oven to 350 degrees F.
2. Grease or butter a 9x13 pan.
3. Mix the flour, powdered sugar and salt for the crust in a bowl. Using a fork or pastry cutter, cut in the butter until mixture resembles coarse crumbs.
 4. Pour crumble mixture into prepared pan and press into bottom. You might want to put some butter or Crisco on your fingers to prevent the flour from clumping on your finger tips. I swear this is the most tedious part of the recipe and is well worth the effort! Just keep pressing until a solid crust is formed.
5. Bake for 20 minutes in your 350 degree oven.
6. Meanwhile, prepare your filling. Zest and juice your lemons (careful to remove any seeds) into a large bowl.
7. Add the remaining filling ingredients (sugar, flour, eggs) to the bowl and beat on medium for about one minute.
8. When crust comes out of the oven, pour the lemon mixture on top and place back in the oven for another 25-30 minutes until edges are golden brown.
9. Let cool for an hour then loosen the edges from the pan and transfer to a wire rack or cutting board. 
10. Let cool another few hours. Cut into bars and serve or place in the refrigerator.
ENJOY!

PS. Teddy was a bit distraught yesterday as we had to move some of his toys and furniture around...once his house was back where it belonged, he wouldn't leave it. Had to claim his territory I guess...Here's a pic of him just hanging out :)

Monday, June 3, 2013

Double Dark Chocolate Cupcakes with Peanut Butter Frosting

Last week I saw an image of a cupcake on one of my friends' Facebook walls. They said it was a dark chocolate cupcake. I've had chocolate cake, I've had devils food cake but I haven't had or made a dark chocolate cake. So of course, I decided I had to try! Over the past few weeks, my go-to for cupcakes has been a boxed cake mix with an added package of instant pudding. I swear you get the most moist, rich, decadent cupcake by doing this. Why switch up a good thing? I was on a hunt to find a dark chocolate cake mix and dark chocolate instant pudding. To my surprise, I was in luck on both accounts! And who doesn't love the combination of chocolate and peanut butter? That made the frosting part pretty easy...just had to find the right consistency and I promise I nailed that one, too. Make these cupcakes and you're sure to please any crowd!!

DOUBLE DARK CHOCOLATE FUDGE CUPCAKES with PEANUT BUTTER FROSTING (and filling!)

What you need for the cupcakes:
1 package of Duncan Hines Dark Chocolate Fudge Cake mix 
1 package of Hershey's Special Dark Instant Pudding (4 oz)
4 eggs (3 called for in the cake mix +1 more) 
Water and oil called for in cake mix


What you need for the frosting:
1.5 cup powdered sugar
1.5 cup peanut butter
1.5 teaspoon vanilla extract
1/2 cup heavy cream
1/4 teaspoon kosher salt
1 stick of butter (room temperature)

To make the cupcakes:
1. Preheat your oven to 350 degrees F.
2. Line cupcake tins with liners. 
3. Mix together the contents of your cake mix, instant pudding mix, eggs, water and oil. Beat at low speed until combined, about 2 minutes. 
4. Bump speed up to medium on your mix and continue beating for another 3-4 minutes. Don't skimp on the beating, this will make your batter light and fluffy and in turn, makes for a delicious cupcake!!
5. Fill liners about 2/3 of the way and bake 20-24 minutes until toothpick inserted in the middle comes out clean. Let cool on wire rack.

To make the frosting:
1. This one is easy- put all the frosting ingredients in a bowl and beat until well combined. I added about another 1/2 cup of powdered sugar at the end because I wanted the consistency to be a bit thicker. 

Put it all together:
1. Once your cupcakes are cool, use your cupcake corer (or a knife if you don't have one) to cut out a small circle from the center of the cupcake. Save these pieces for later.
2. Fill your frosting decorator tool (bag or injector) with peanut butter frosting and fill the center hole with frosting. 
3. Take the cupcake pieces you had removed from the center and break them in half. Place the top portion back onto the cupcake (on top of the filled center).
4. Refill your frosting decorator tool and frost the tops of the cupcakes.


ENJOY!!