Saturday, April 6, 2013

Crunch Chocolate Peanut Butter Cups

Time for another yummy no-bake recipe! 
 
CRUNCHY CHOCOLATE PEANUT BUTTER CUPS

What you need for the PB Cups:
1/2 cup butter
1 1/2 cup peanut butter
3/4 cup graham cracker crumbs
3/4 cup Rice Krispie
1/2 cup powdered sugar
1 1/2 cup milk chocolate bark (this is 6 large squares or half of a package) chopped into pieces

1 Tablespoon shortening


To make the PB Cups:
1. Line a mini muffin tin with papers (you could also use a regular size tin if you want bigger portions).
2. In a microwave safe bowl, melt your butter & peanut butter together at 30 second intervals and stir until smooth.  (This took a total of about a minute for me)


3. Add the graham cracker crumbs, Rice Krispies and powdered sugar and mix until combined.

4. Distribute the mixture evenly in the prepared muffin cups. Pop in the fridge for at least 15 minutes to set up the PB layer.(I had to do this in batches because I only have two mini muffin tins.)
5. After the peanut butter has chilled, combine the chocolate and shortening in a microwave safe bowl and heat in 30 second intervals until it is smooth. I then transferred mine over to a pourable Pyrex measuring cup and poured chocolate on top of each cup.  

6. Finally, pop them back in the fridge until firm, at least 30 minutes. 
Keep them stored in a covered container in the fridge for up to two weeks.  
This made about 52 mini cups; it would probably make about 20 large cups.


ENJOY! 

Granola Bars

Good Morning!! In preparation for our overnight Relay for Life walk this evening, I've been making us some snacks to keep us fueled up! I've already got a trail mix bagged up but decided I also wanted to try my hand at some granola bars, too. I looked at about a dozen recipes before deciding to just mix up my own batch...probably not the best of ideas since I got more of a square than a bar and some of it crumbled into just plain granola. Oops! However, I will say that the flavor profile is really, really good! With the crumbling in mind, I've updated the recipe below to make yours a bit more stable and sticky. I think adding some extra peanut butter and whatever syrup you choose will most definitely help. Just use this recipe as a base and swap in what you have on hand or other flavors that your family loves! A yummy, healthy way to keep your family fueled all week long!

HOMEMADE GRANOLA BARS

What you need for the bars:
1/2 cup dry roasted peanuts
1/2 cup roasted sunflower seeds or other chopped nuts (I used cashews)
2 cups dried fruit, chopped (I used 1 cup raisins and 1 cup figs)
2 cups rolled quick oats
2 cups rice or other grain cereal (I used Rice Krispies)
3/4 cup creamy or crunch natural peanut butter
1/2 cup packed brown sugar
3/4 cup corn syrup or honey (I used 1/4 cup pure maple syrup and 1/4 cup natural honey since the original recipe called for 1/2 cup...in hindsight the maple syrup may have been too thin for this and corn syrup may help hold things together better.)
1 teaspoon pure vanilla extract

To make the bars:
1. Preheat your oven to 275 degrees F.
2. Spray a 9x13 pan with cooking spray or grease.
3. Mix all of the dry ingredients (nuts, fruit, oats and cereal) in a large bowl. 4. Be sure to chop your nuts and/or fruit if needed.

5. In a small sauce pan, heat the peanut butter, brown sugar, and syrup/honey.
6. Stir until bubbling and hot. Take off the heat and mix in the teaspoon of vanilla.  
7. Pour peanut butter mixture over your dry ingredients and mix until combined. 
8. Pour mixture into prepared pan and bake in preheated oven for 10 minutes until golden brown.
After baking.
8. Let cool about an hour and then cut into bars or squares. Store in an airtight container for about 2 weeks.
I got about half of it to break into squares or chunks.
Some more of the chunks... 
The rest I just bagged up and will use for grab and go snacking!
Hope the revised version works for you! ENJOY!!

Wednesday, April 3, 2013

Mac 'n Cheese

Hi Everyone! Happy April! Looks like Teddy is making friends while we're gone at work!! We had this little visitor several times over the weekend and they are so cute!! Just sit there staring at one another- neither of them meows or hisses, just checking one another out. :) I think this means that Teddy really needs a little sister around here! ;)

                      We don't even know if his little friend is a girl or a boy but we call it               Butterscotch.... pretty appropriate for a cooking blog, huh?

Anyway, after we got these pics, I got busy in the kitchen with my famous mac 'n cheese recipe. I've made this for numerous occasions and events and have gotten positive feedback every time. The cheese can be switched up every time and so can the spices. Make it spicy, make it smokey, make it any way you like it!! Once you get the roux part down, all you need to do is add the cheeses and spices that suit your mood or party. Have fun and be creative!

MAC 'N CHEESE

What you need for the Mac 'n Cheese:
Kosher salt
Vegetable Oil
1 lb box of elbow macaroni
1 quart (4 cups) of milk
1 cup (1 stick) of butter
1/2 cup of flour
4 cups of Gruyere or another mild cheese (like swiss), shredded
2 cups of sharp cheddar cheese, shredded
1/2 teaspoon of ground black pepper
1/2 teaspoon of ground nutmeg
1 teaspoon (we like ours spicy) of cayenne pepper
Optional- 1 cup of bread crumbs or crushed up potato chips

To make the Mac 'n Cheese:
1. Preheat your oven to 375 degrees F.
2. Boil a large pot of water with a drizzle of oil and some kosher salt. Add the macaroni and cook according to package directions, about 8 minutes. Drain and set aside.
3. Pour your milk into a sauce pan and turn on low heat; do not bring to a boil but keep the milk on the heat long enough to warm.
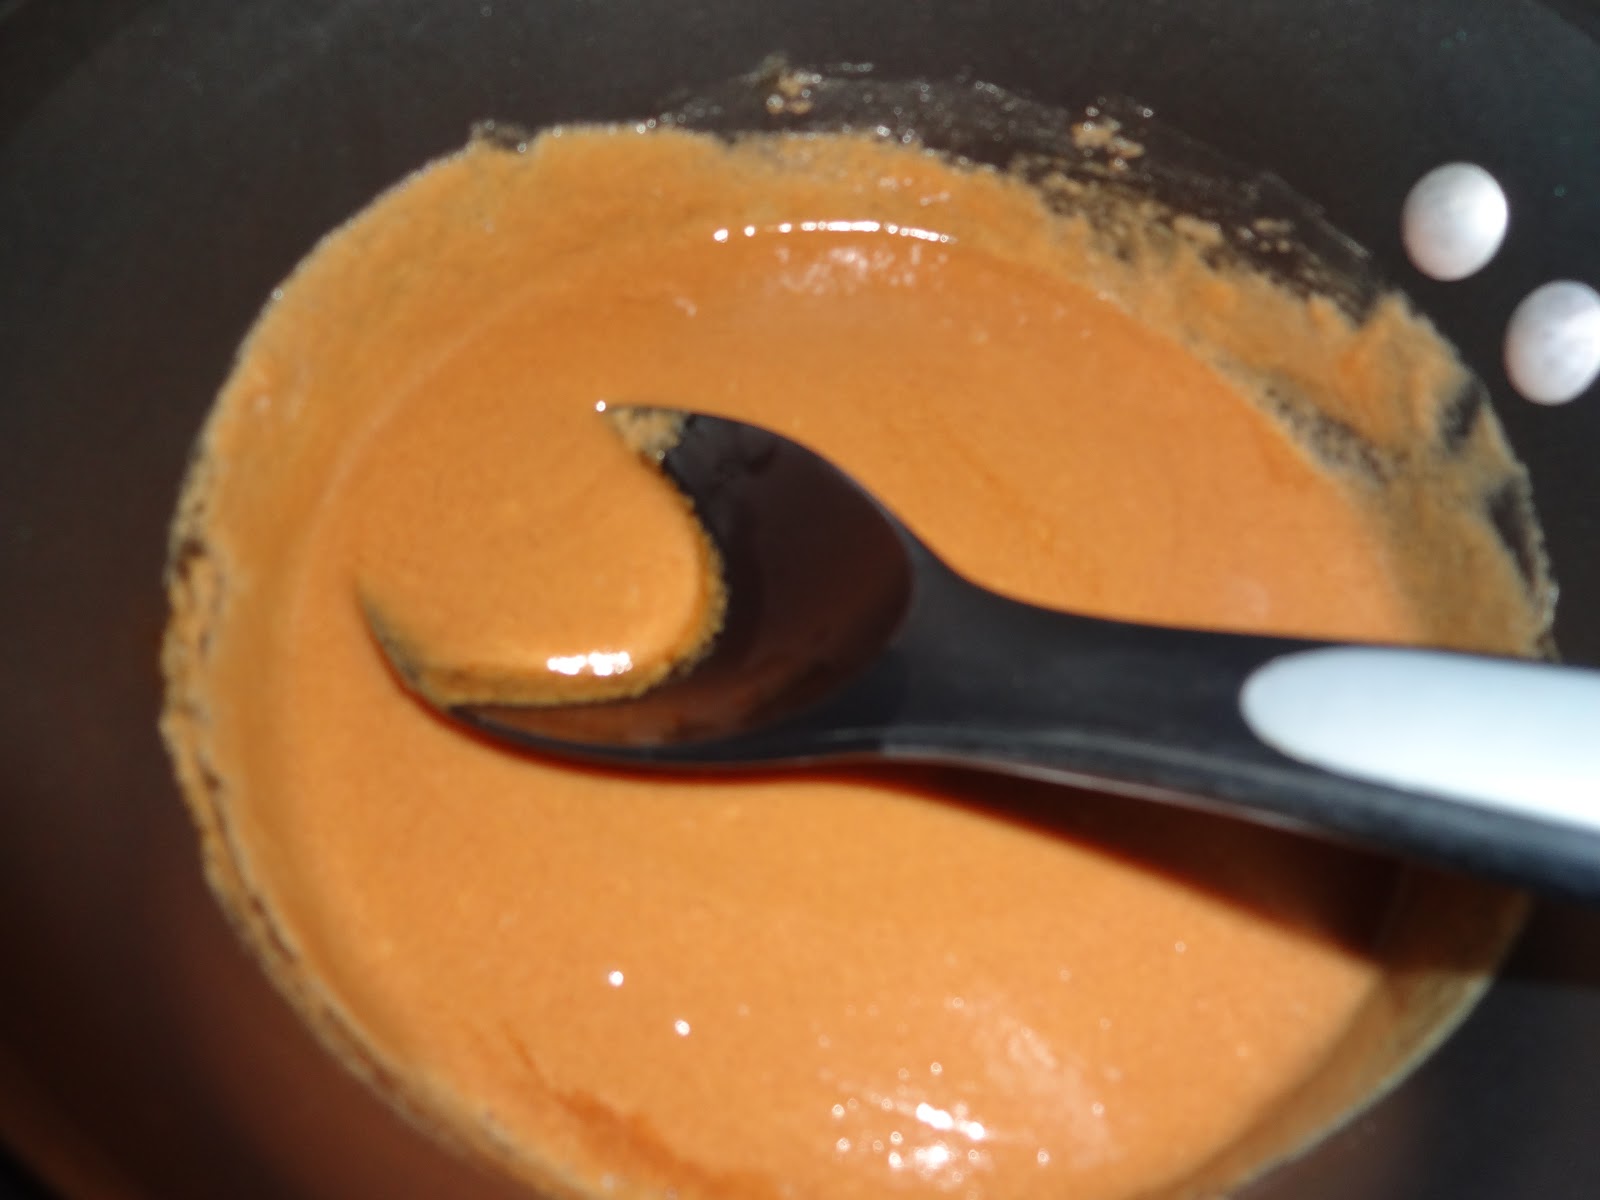
4. Melt 6 tablespoons of your butter in a large pot. Add your 1/2 cup of flour and mix well until combined.
5. Cook about 4-5 minutes until brown and to cook off the flour taste.
6. Slowly add the milk to your roux mixture and keep mixing about 3-4 minutes until the mixture has become thick and smooth.
7. Turn heat to low and slowly add in your shredded cheese; keep mixing until melted and smooth. Continue this process until all of your cheese has been incorporated.


8. Once cheese mixture is smooth, remove from heat and mix in your cracked black pepper, cayenne pepper and nutmeg (I mixed mine in a bowl first and then poured it all in). 
9. Add your macaroni to the cheese and mix until combined. (NOTE: I usually take out some of the cheese sauce because there is always too much. I save this in the fridge or freeze it for another time.)
10. Transfer to a baking dish and top with bread crumbs or crushed up potato chips. Bake in your preheated oven about 20-25 minutes until bubbly and crispy on top!
I topped with a little extra parmesan- yummy!
ENJOY!

Sunday, March 24, 2013

Cinnamon Bread

Hello!! Didn't want to make a liar out of myself so here I am! Back with the second recipe of the weekend. :) This is a scrumptious, cinnamon bread that you have just GOT to try!! Great for breakfast or really anytime you want a little sweet treat. It's also great because this doesn't require any yeast, rising or waiting. Just mix it up and then pop it in the oven. I made quite a few changes to this recipe so be sure to follow along!

CINNAMON BREAD

What you need for the cinnamon bread:
For the filling:
1/3 cup white sugar
2 teaspoons ground cinnamon
For the bread:
2 cups all-purpose flour
1 tablespoon baking powder
1/2 teaspoon salt
1 cup light brown sugar
1 egg, beaten
1/2 cup milk
1/2 cup half and half or heavy cream
1/3 cup vegetable oil

To make the cinnamon bread:
1. Preheat your oven to 350 degrees F. Lightly grease (I used Crisco) a 9x5 inch loaf pan.
2. In large bowl combine flour, baking powder, salt and 1 cup sugar. 
3. Add the egg, milk, cream, and oil to flour mixture and stir until just moistened.
4. Pour half of the batter into pan.
 
5. Combine your 2 teaspoons of cinnamon with the 1/3 cup of sugar and mix.
6. Top half of your batter with the cinnamon and sugar mix leaving just a little left. Pour the rest of your batter on top of the cinnamon middle and top with the remaining cinnamon and sugar.
7. Bake for 40-50 minutes in your preheated oven until a toothpick inserted in the center comes out clean. Let cool in pan for about 10 minutes before transferring to a dish to finish cooling.
This creates a cinnamon-y crunchy top!

Once cool, wrap and store in foil.
ENJOY!!

Saturday, March 23, 2013

Chocolate Cracker Crunch

Sorry for the long hiatus everyone! Work, travel and family have been super busy!! Plus, I was utilizing a lot of the recipes that I've already posted about so I didn't want to be redundant. Don't worry, I'm back in full swing and have two recipes to share with you this weekend! This one is a sweet, simple, no-bake treat that you can whip up in about a half hour! The ingredients may seem odd but believe me, one bite and you'll be hooked!! I didn't alter much of the recipe other than that I added more than what was originally suggested for the topping and I offered another option below. Have fun!!

CHOCOLATE CRACKER CRUNCH BARS

What you need for the crunch bars:
80 Club crackers
Even with a stick of butter...why not save a few extra calories?
1 cup of butter (two sticks)
2 cups of graham cracker crumbs
1 cup packed light brown sugar
1/2 cup milk
1/3 cup white sugar
For later- 
2/3 cup creamy peanut butter
1/2 cup semi-sweet chocolate chips (I made this a heaping half cup and would suggest closer to 3/4 cup)
1/2 cup butterscotch chips (same as above with these chips!)
Option- instead of adding extra chips, try mixing in a 1/2 cup of prepared caramel icecream topping...I'm definitely doing this next time!!

To make the crunch bars:
1. Line a 9X13-inch baking pan with foil (do not grease), leaving an overhang of foil on either end. 
2. Line the foil with 1 layer of club crackers; they should fit pretty perfectly as mine did but if not, just break them to fit.
3. In a large saucepan, melt butter over medium heat. Add graham cracker crumbs, brown sugar, milk and white sugar. Bring to a boil and then boil for 5 minutes, stirring often. Your mixture will be thick.
4. Remove from heat and spread half of the butter/graham mixture evenly over your prepared crackers.
5. Place another single layer of crackers evenly over the butter/graham mixture. 
6. Spread the rest of your mixture evenly over crackers. Top evenly with remaining crackers.
7. Now, in a small saucepan, combine peanut butter, chocolate chips, and butterscotch chips. (If you use my caramel option, put that in here now, too!) 
8. Melt over medium-low heat, stirring constantly. 
9. Spread evenly over the top of your crackers. Now, pop the pan in the fridge for about an hour. Once cool, lift foil overhang and place bars on a cutting board. 

This is after I pulled them out of the pan.
The foil makes this really easy!
10. Cut into bars. Store in the refrigerator.
YUM!!
ENJOY!!
My boys hanging out with NASCAR while I was in the kitchen! <3


Thursday, March 7, 2013

Blueberry Muffins

Who doesn't love a soft, sweet blueberry muffin for breakfast? On a cold winter's day or a bright, springy morning these muffins are perfect for any breakfast occassion! I got some blueberries from Sam's Club a few weeks back and had a lot to use so I was on a mission to find a great recipe. I think this one hits the spot-using sour cream as a secret ingredient. They stay moist and crunchy with the streusel topping. Yum! Try whipping these up for your family or friends this weekend!

BLUEBERRY MUFFINS
What you need for the muffins:
2 eggs
1 cup sugar
1/2 cup vegetable oil
1/2 teaspoon vanilla extract
2 cups all-purpose flour
1/2 teaspoon salt
1/2 teaspoon baking soda
1 cup sour cream
1 heaping cup fresh blueberries (rinsed and dried)
What you need for the crumb topping:(this is from a previous recipe)
1/2 heaping cup packed brown sugar (I used dark brown sugar- I think it adds a more intense flavor!)
1/3 heaping cup all-purpose flour
1/3 cup rolled oats
1 1/2 teaspoon ground cinnamon
4 tablespoons butter, melted

To make the muffins:
1. Preheat oven to 375 degrees F and grease or line your muffin cups with paper liners.
2. In a large bowl beat your eggs; gradually add sugar while continuing to beat.
3. Continue beating while adding the oil, then stir in vanilla.
4. In a separate bowl combine flour, salt, and baking soda.
5. Add the dry ingredients to the batter alternately with the sour cream.
6. Gently fold in the blueberries with a spatula. 
7. Prep your crumb topping by mixing all dry ingredients with the melted butter in a large bowl with a pastry cutter.
 7. Fill each of your muffin cups about 2/3 full.
8. Sprinkle with prepared crumb topping.
9. Bake in preheated oven for 18 - 22 minutes; remove from muffin cups and allow to cool on a wire rack. 

 ENJOY!!